

Have fun with the assembly and if you have any questions, feel free to write us at support@pmm.gg. Start with the SORA v2 disassembly and come back here. The instructions will soon be updated for the side button version. For questions, please contact support.
What you need
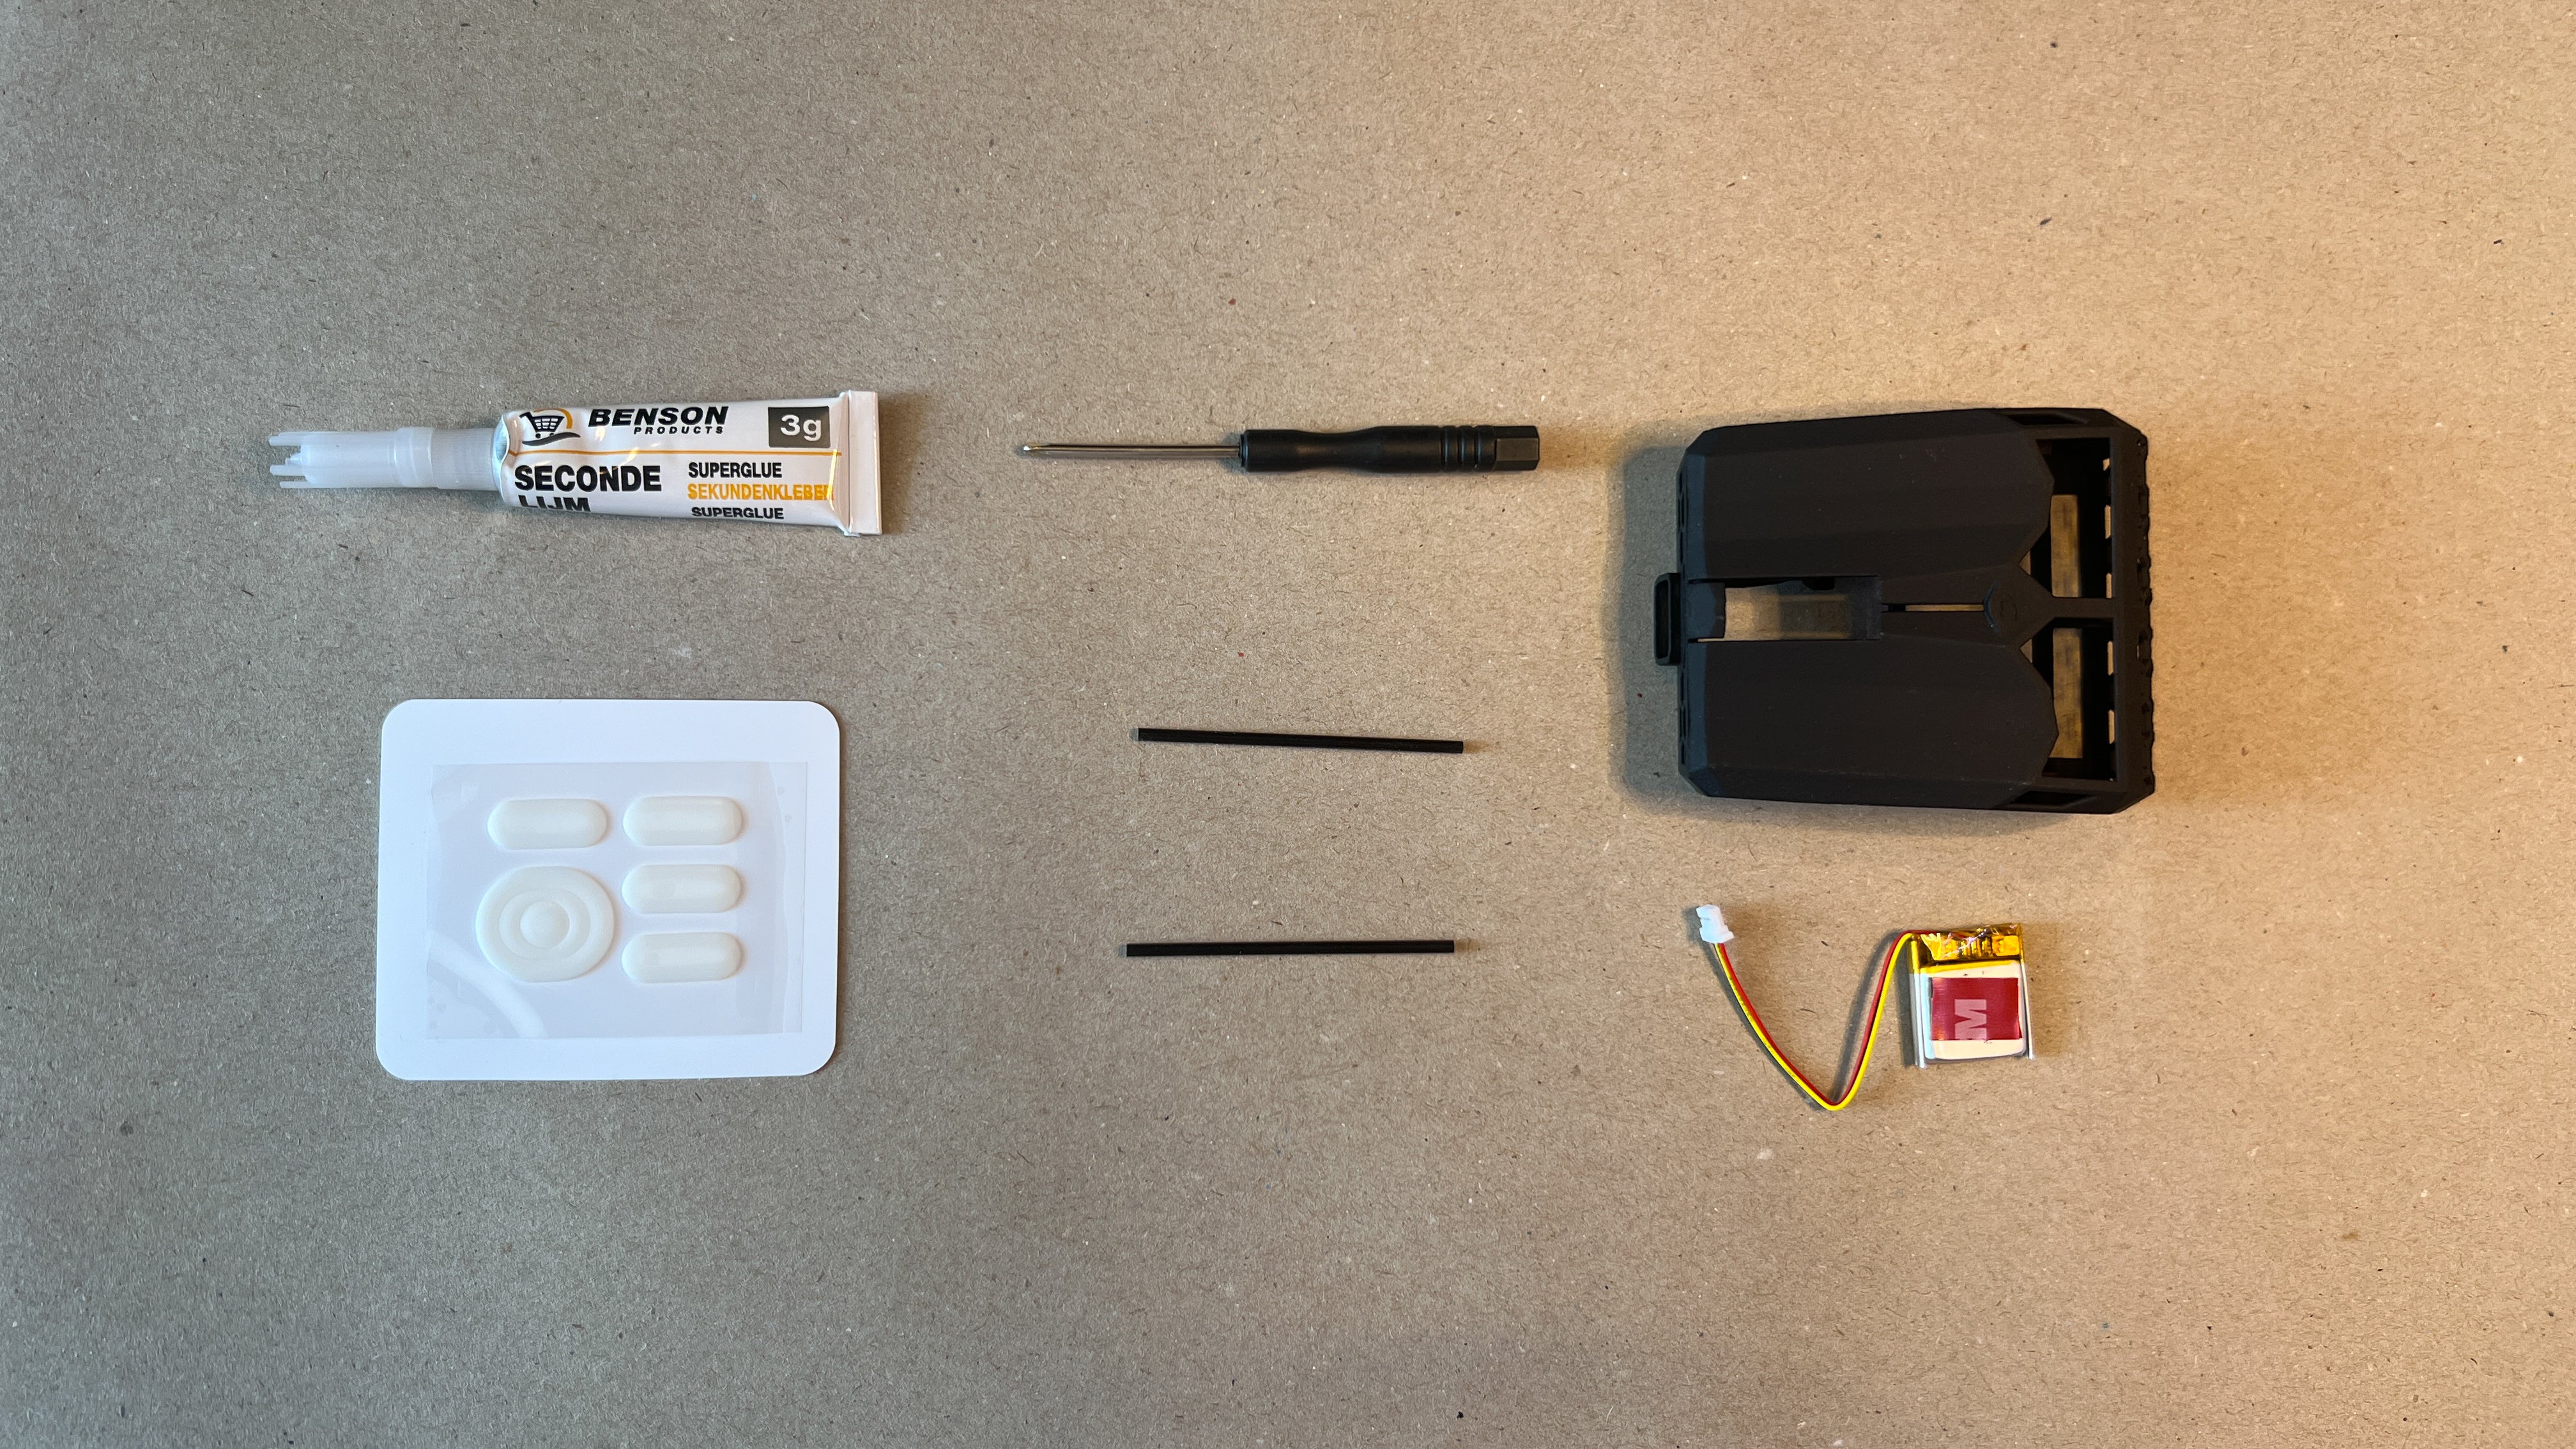
Shell, PCB, Battery, Skates, 4 Cross screws (from the PCB), Cross screwdriver, 2x Carbon Fiber Rods (If you decide to use them) Glue for the lens
Side button Version
Adding the side buttons is difficult in the current design version. The following video demonstrates a possible way.
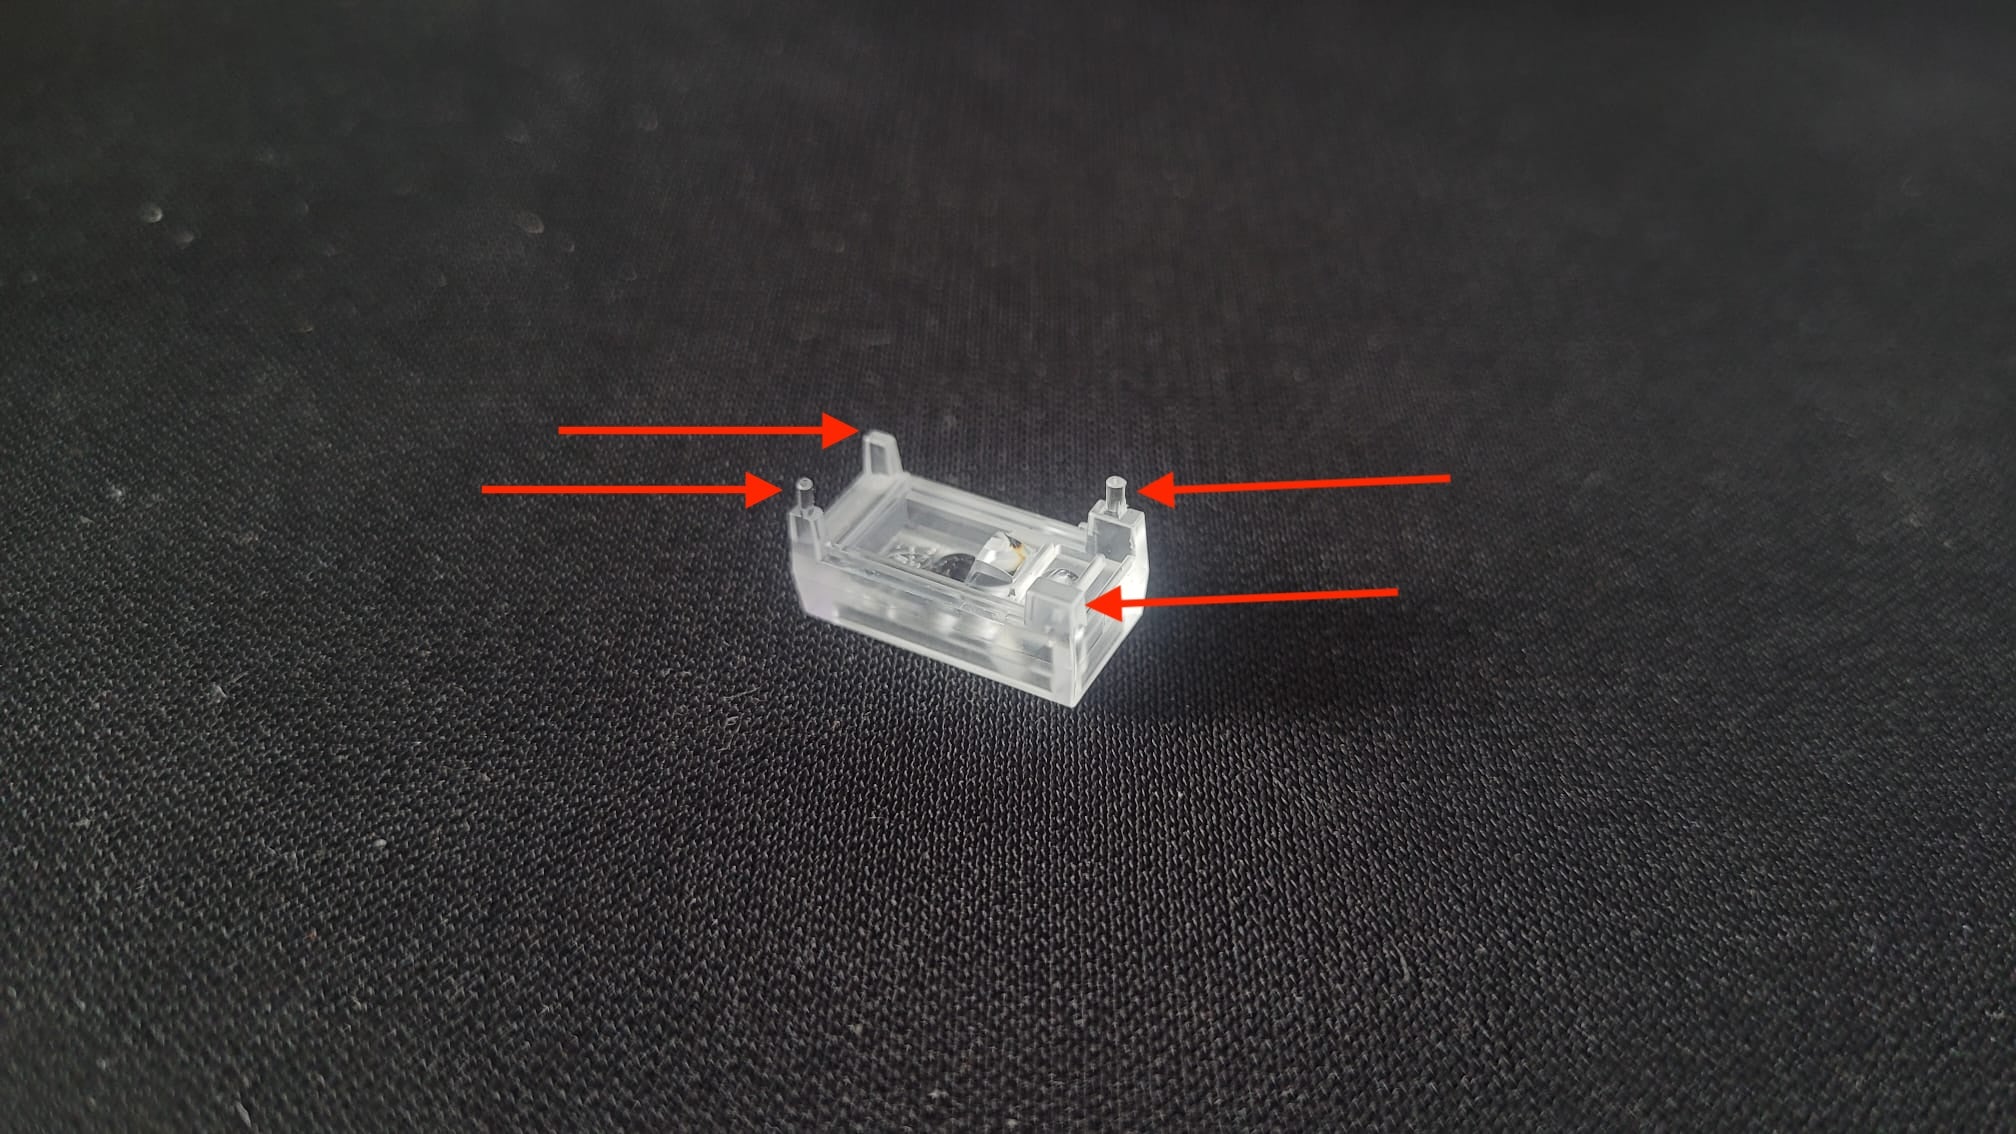
Step 1: Place the side buttons in front of the holder
Step 2: Push the hook of the holder behind the side buttons
Step 3: (Preferably) Use pliers to insert the sidebuttons into the holder
Insert Carbon Fiber Rod
Start to insert the rod on the side with the arrow. Click it in the rod holder on the other side as well as in the middle beam.
Glue the sensor lens to the PCB
Put a drop of super glue on a sheet of e.g. paper and dip all 4 pins of the lens into it. Do not use too much glue.
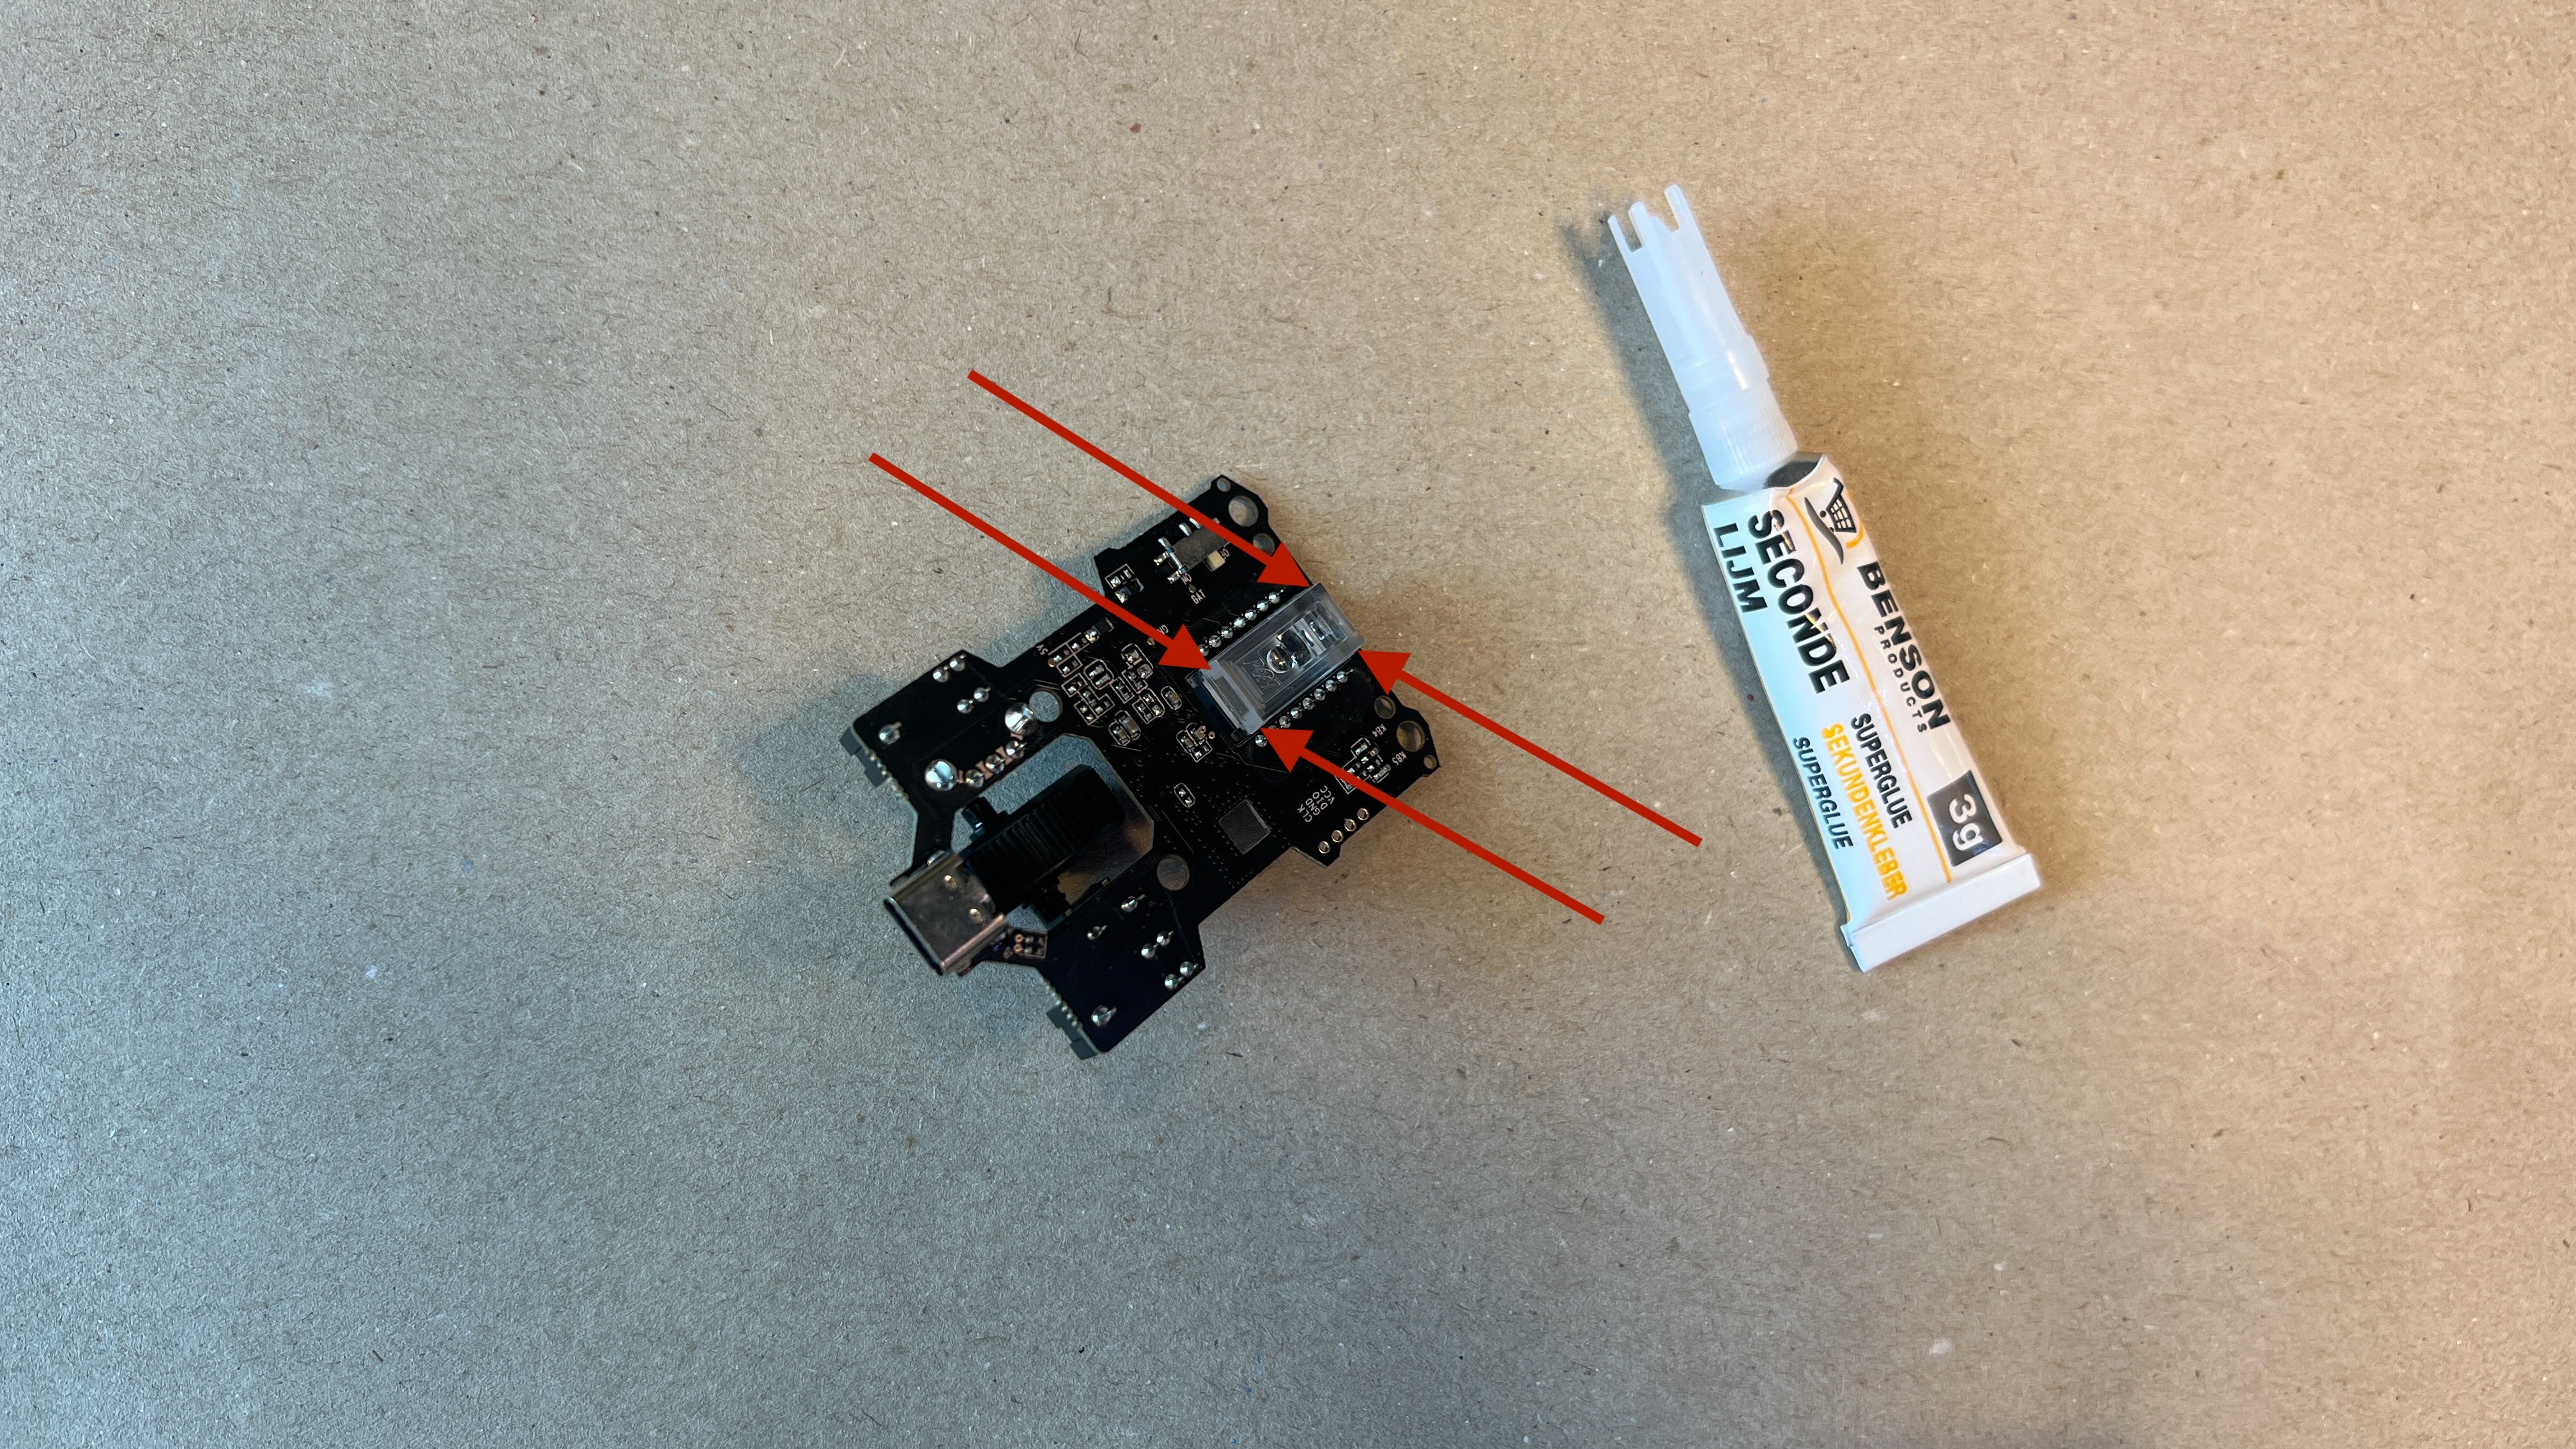
Add the sensor to the PCB
Wait for 5 mins until glue is fully dry.
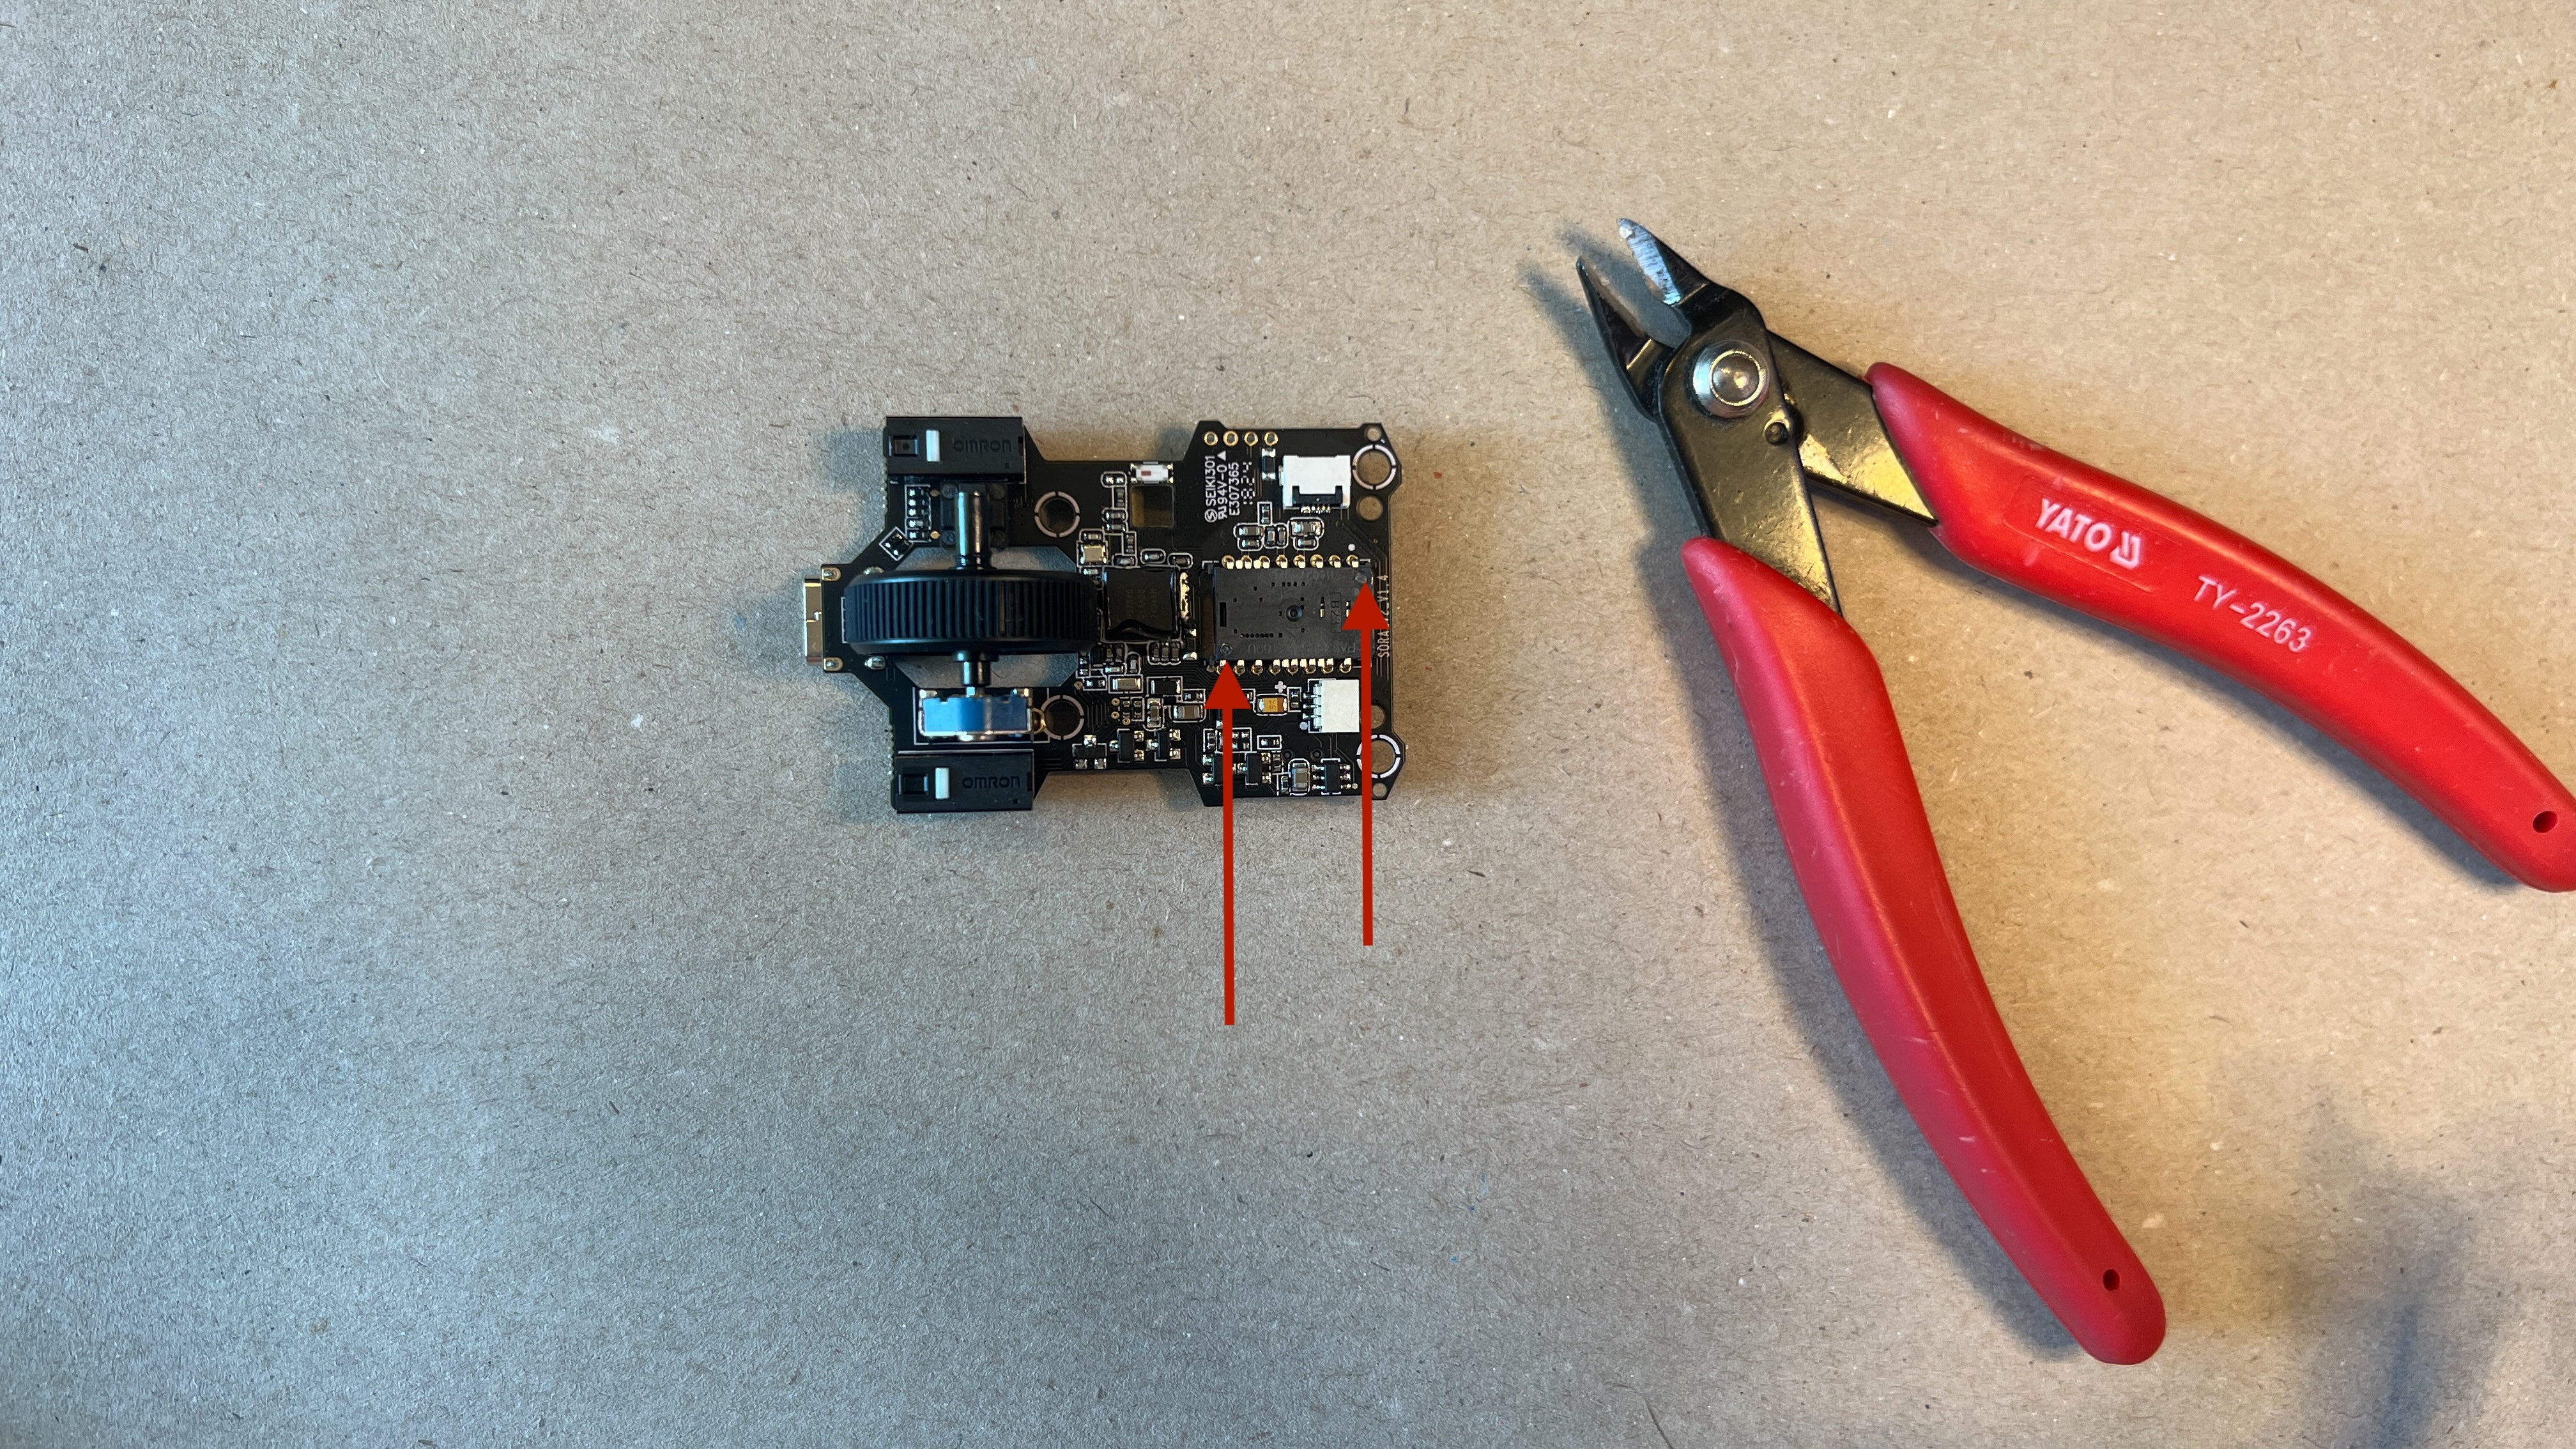
Prepare the space for the battery
Cut the two pins of the sensor so that the Battery can be placed on it. You can also use an X-acto knife to remove them.
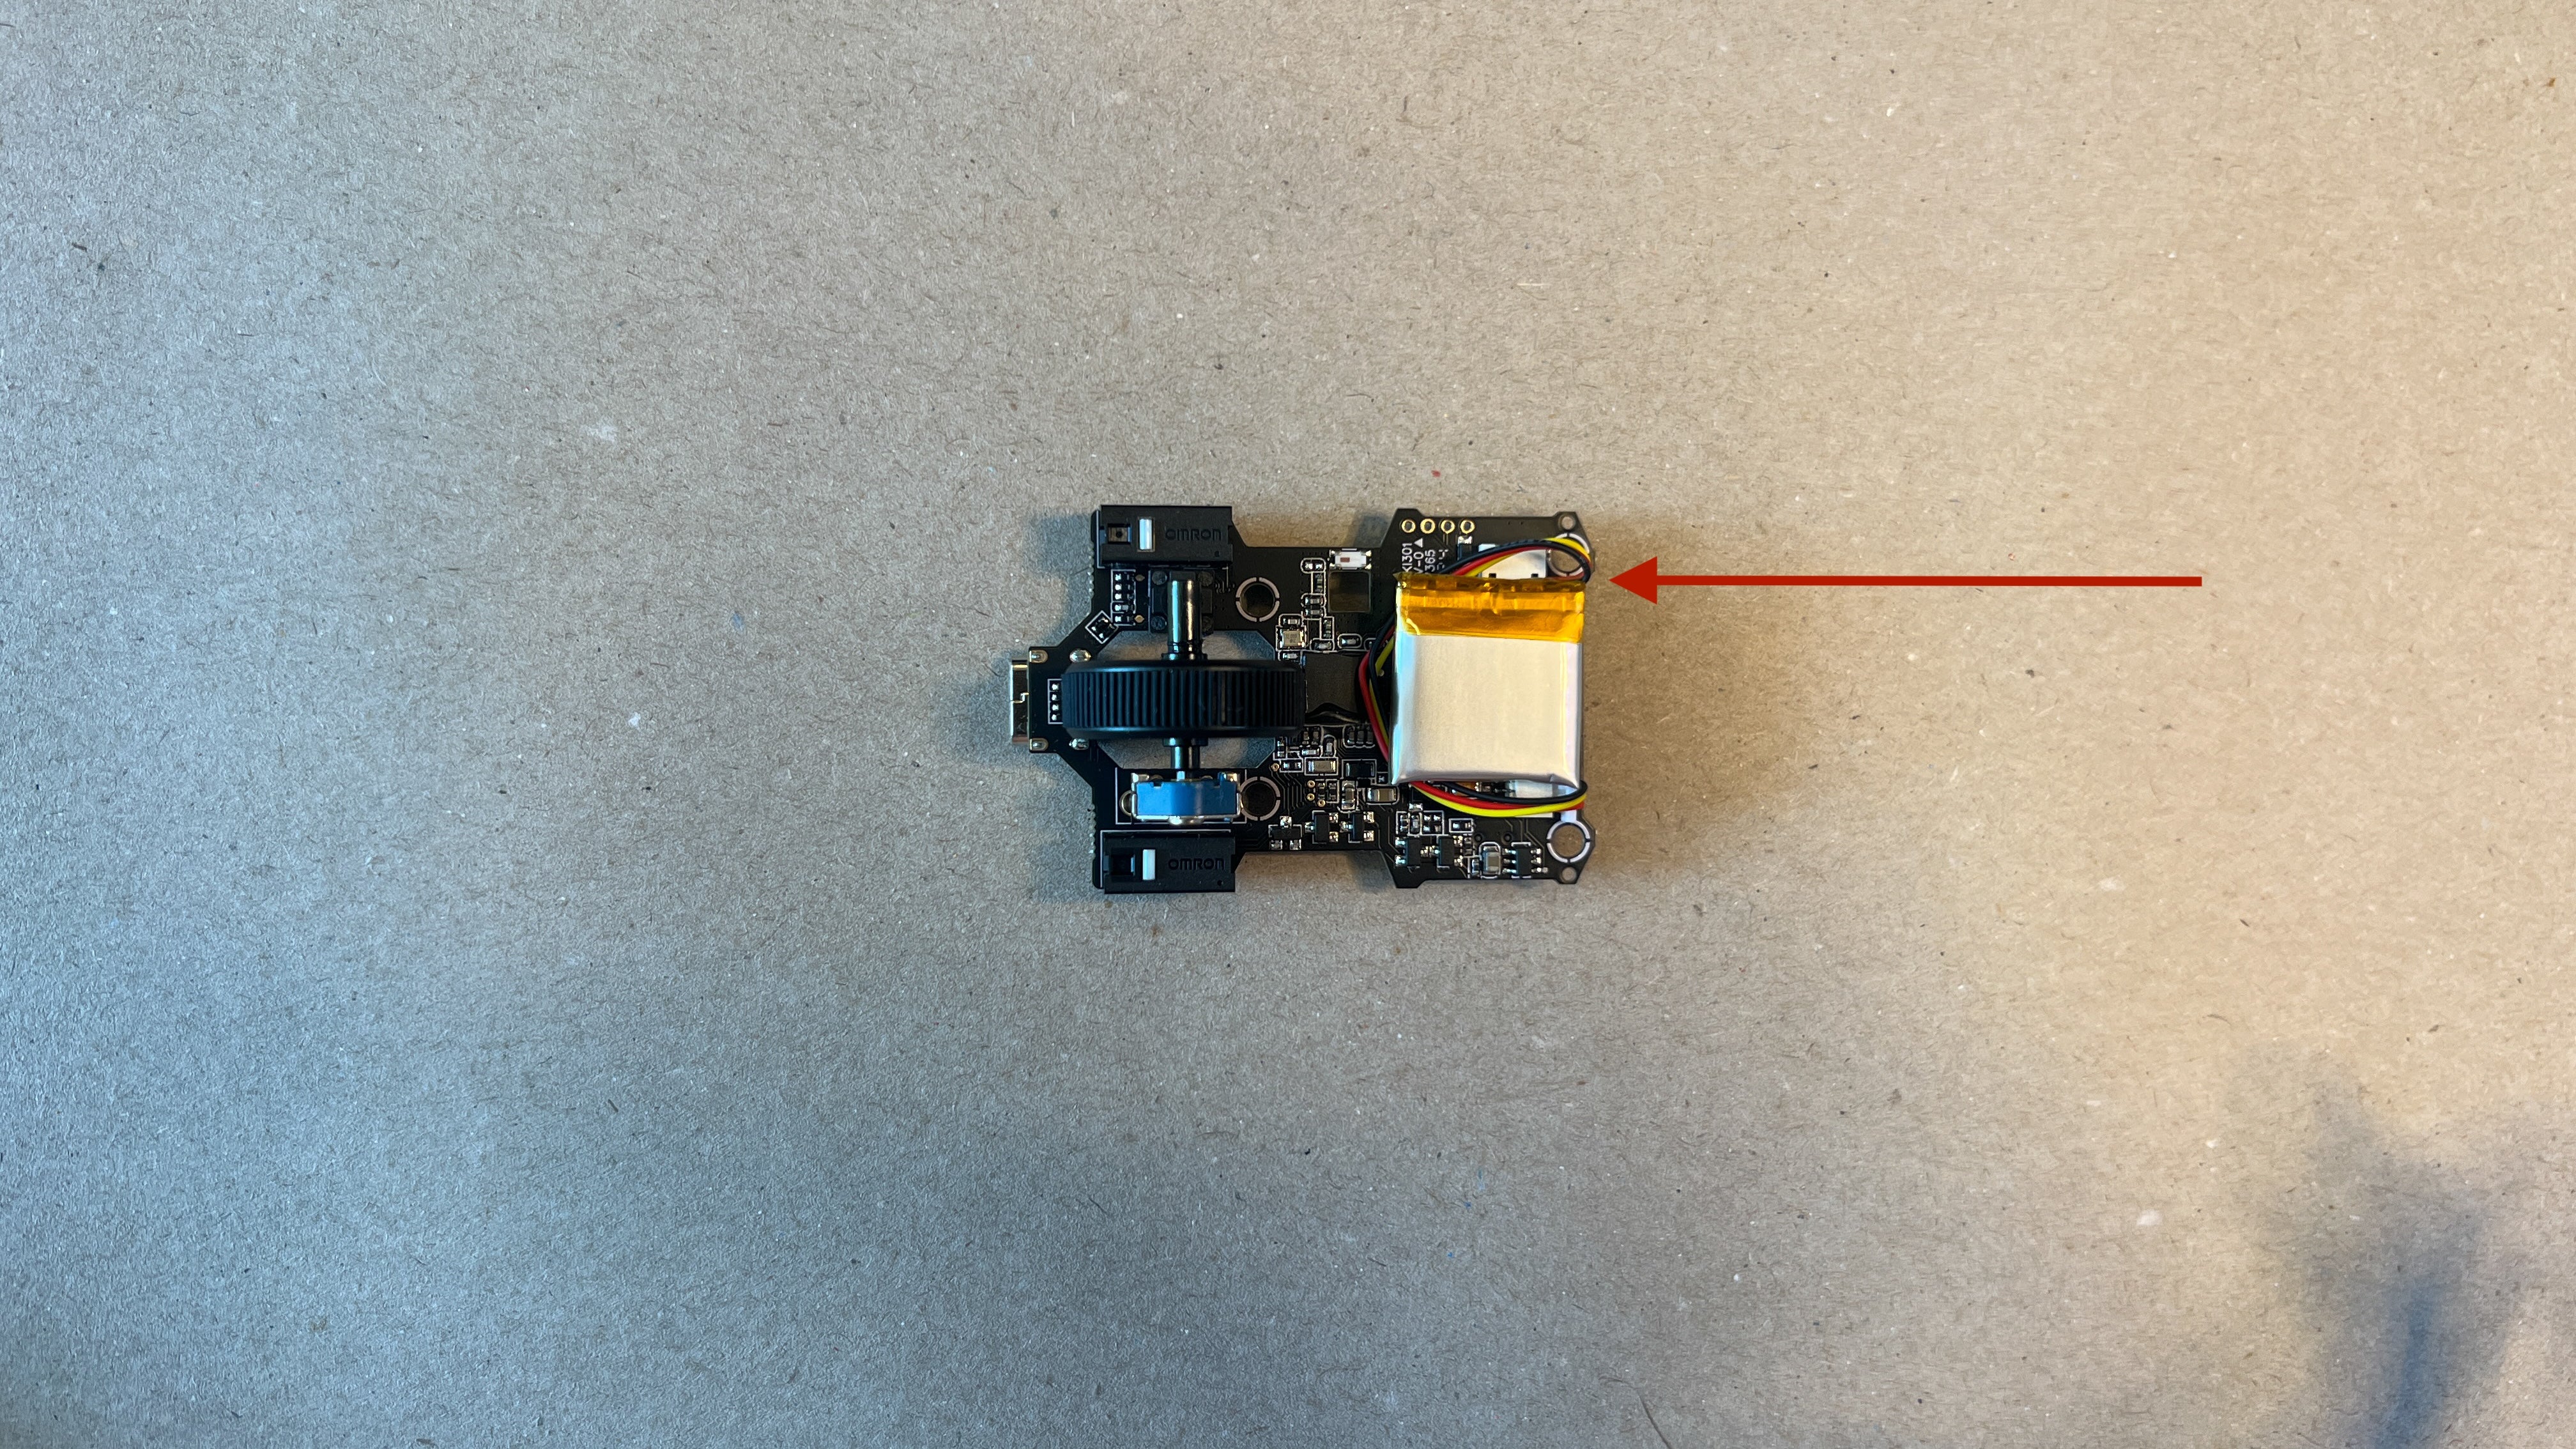
Connect the Battery with the PCB
Plug the Battery in the holder, take off the tape from the battery and press the battery on the holder. This orienation later helps with the assembly.
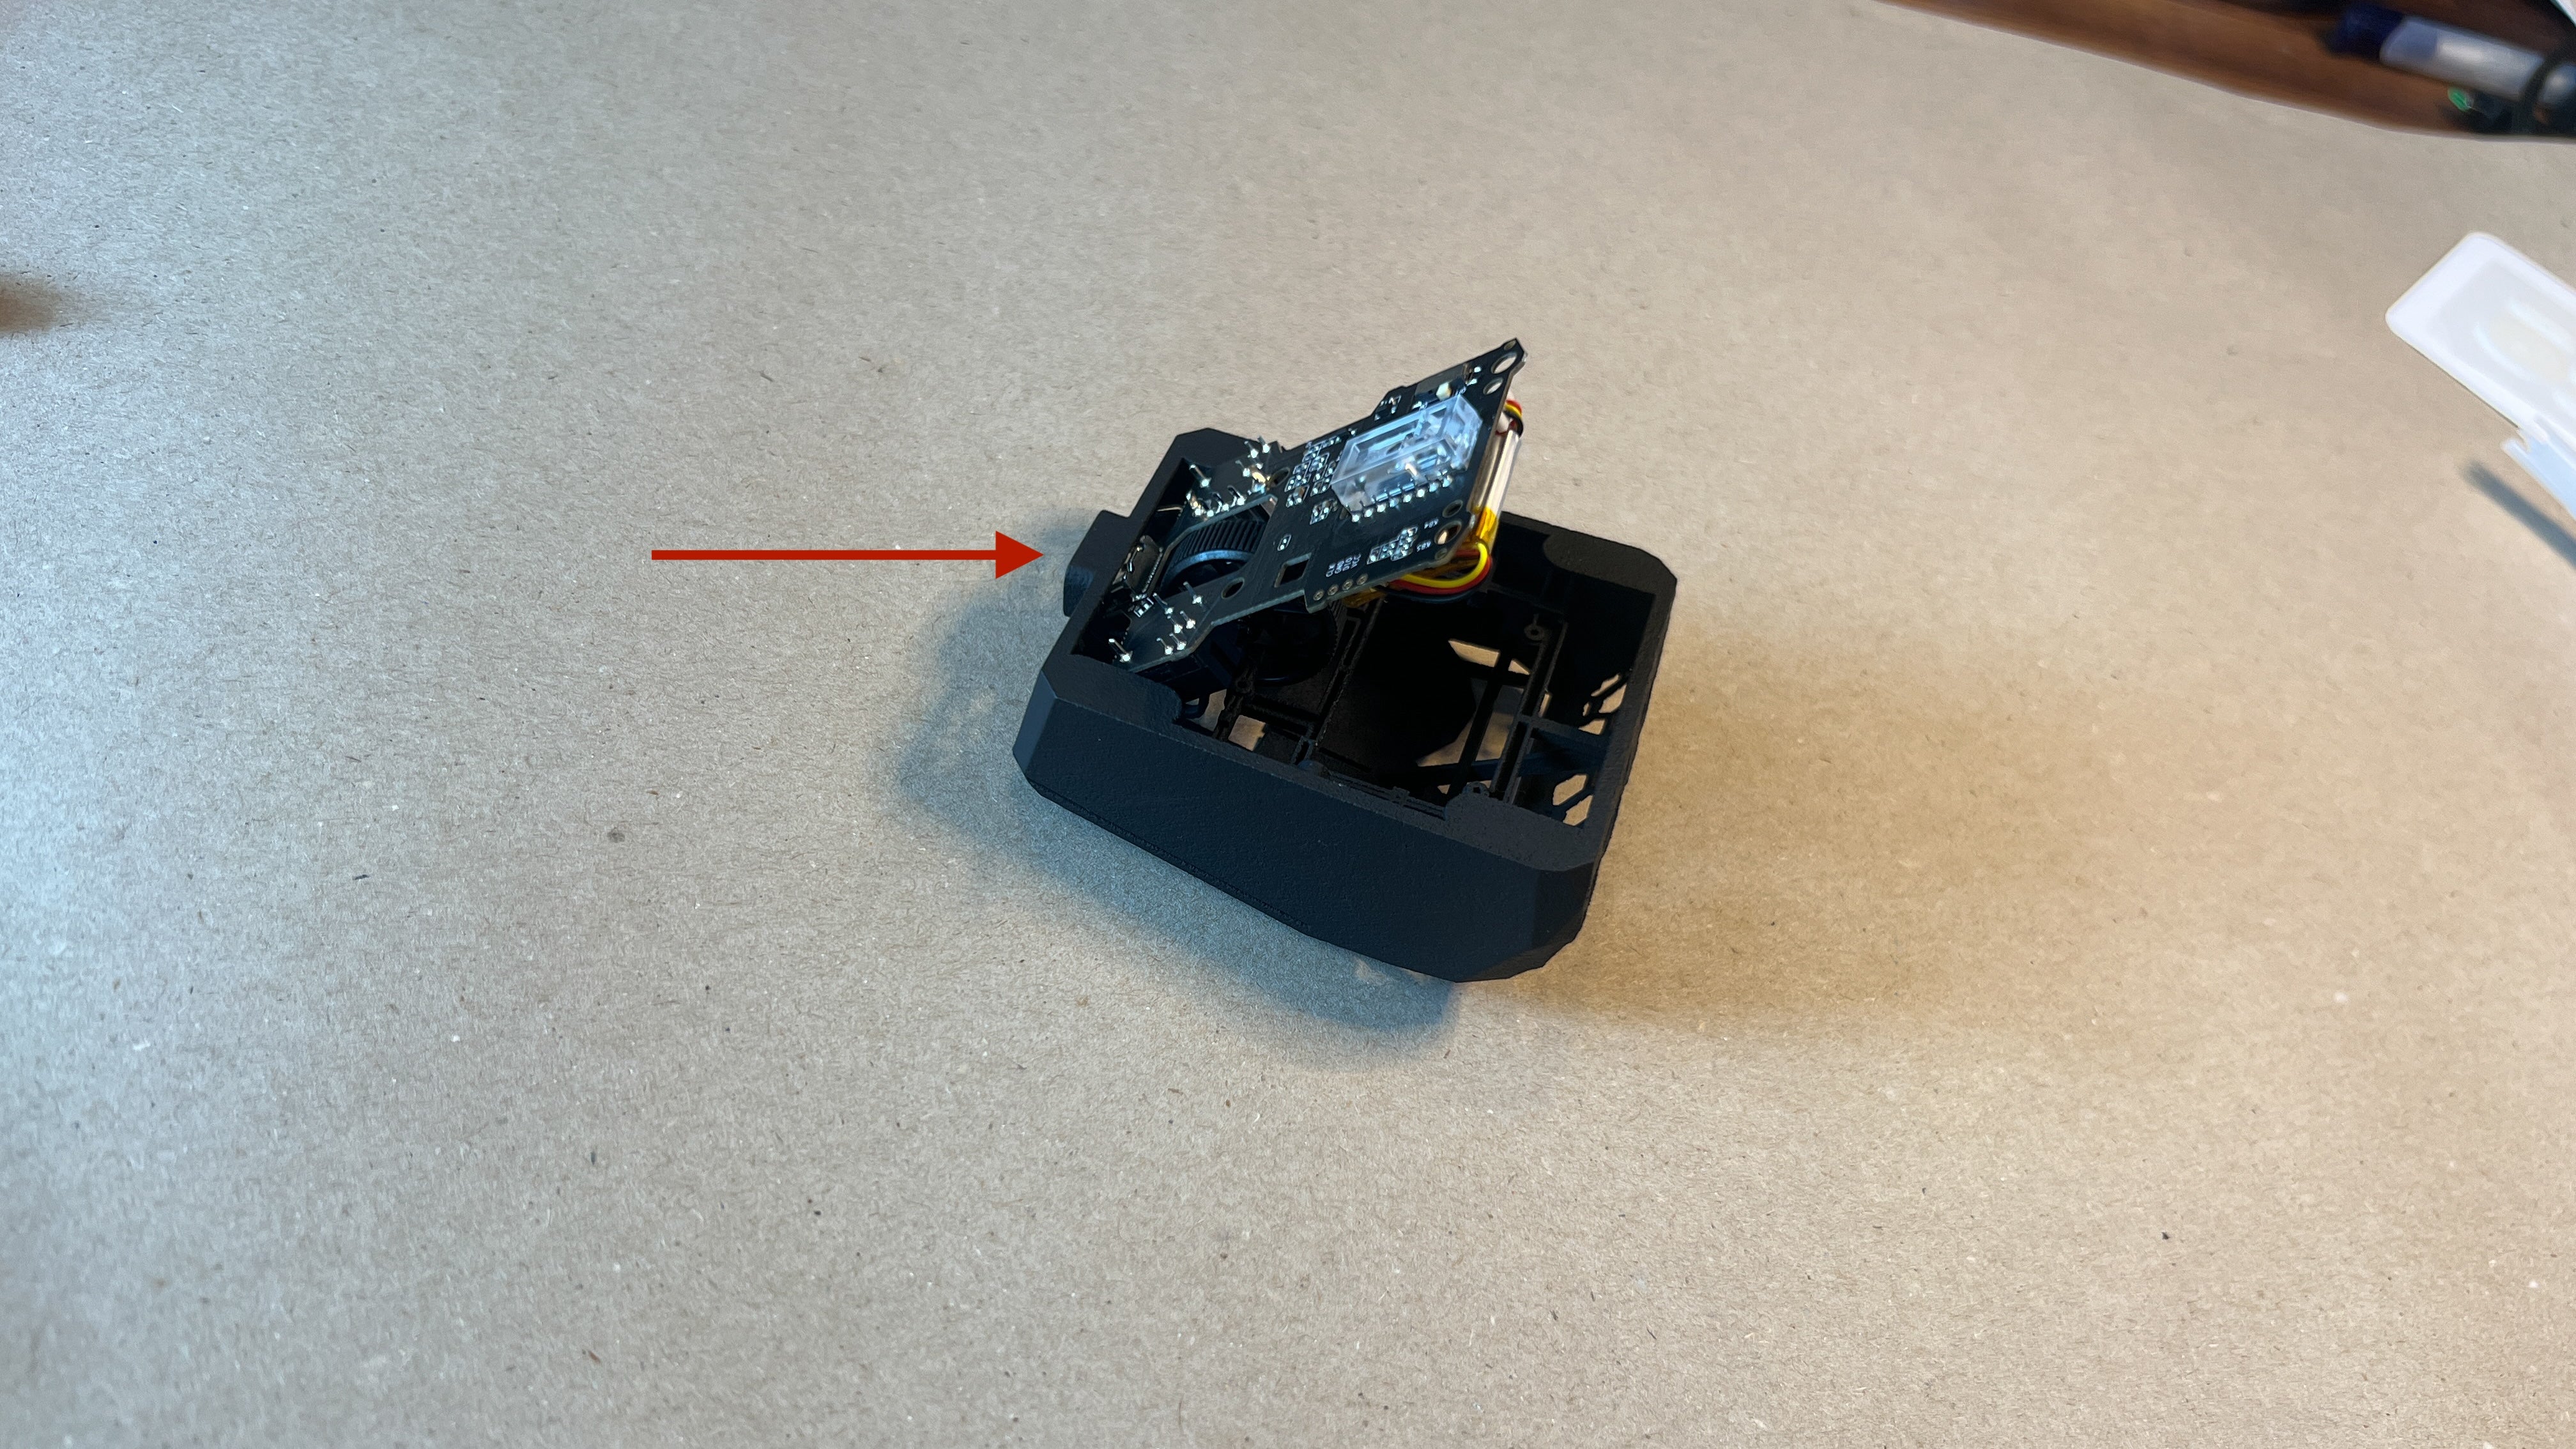
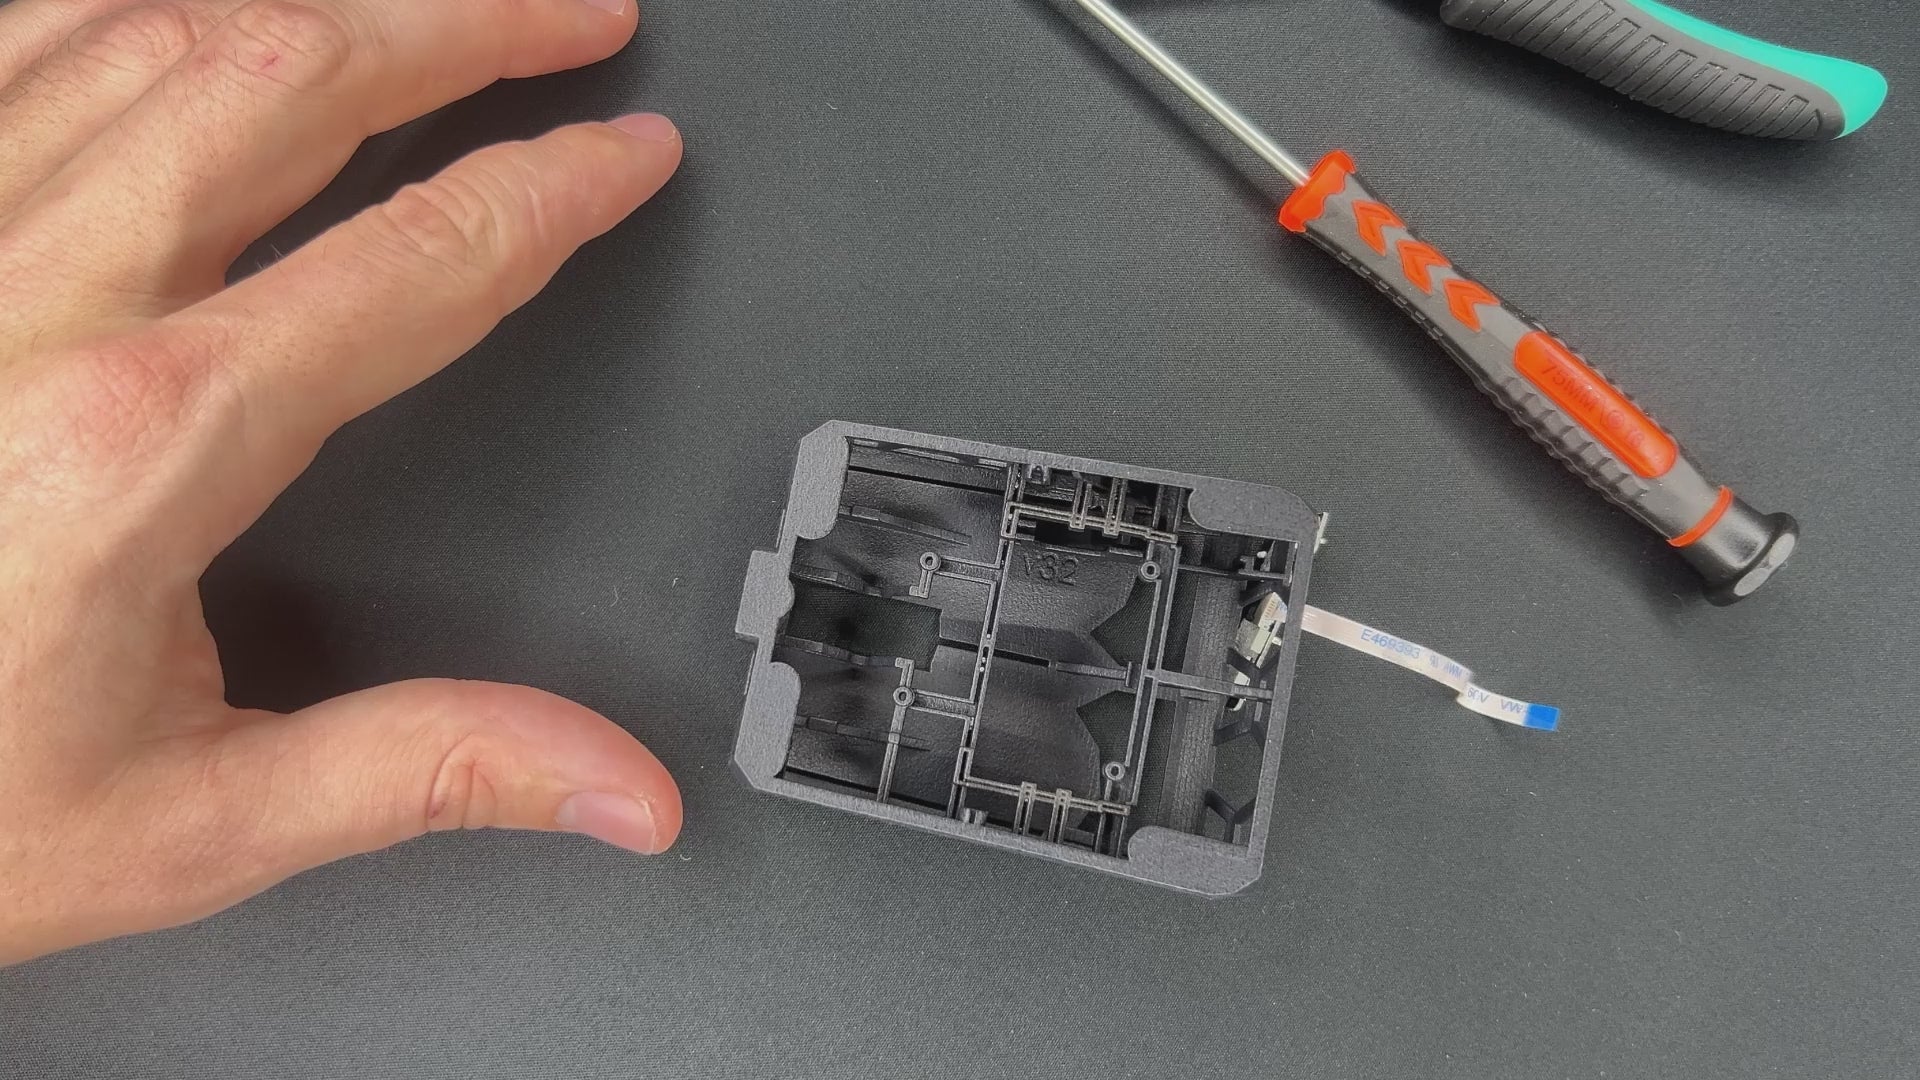
Add the PCB to the Shell
Start with placing the USB-C socket in the designed hole.
Don't push immediately
The encoder will stop the PCB from directly going into place. The micro switch might also be in the way. Read the next step.
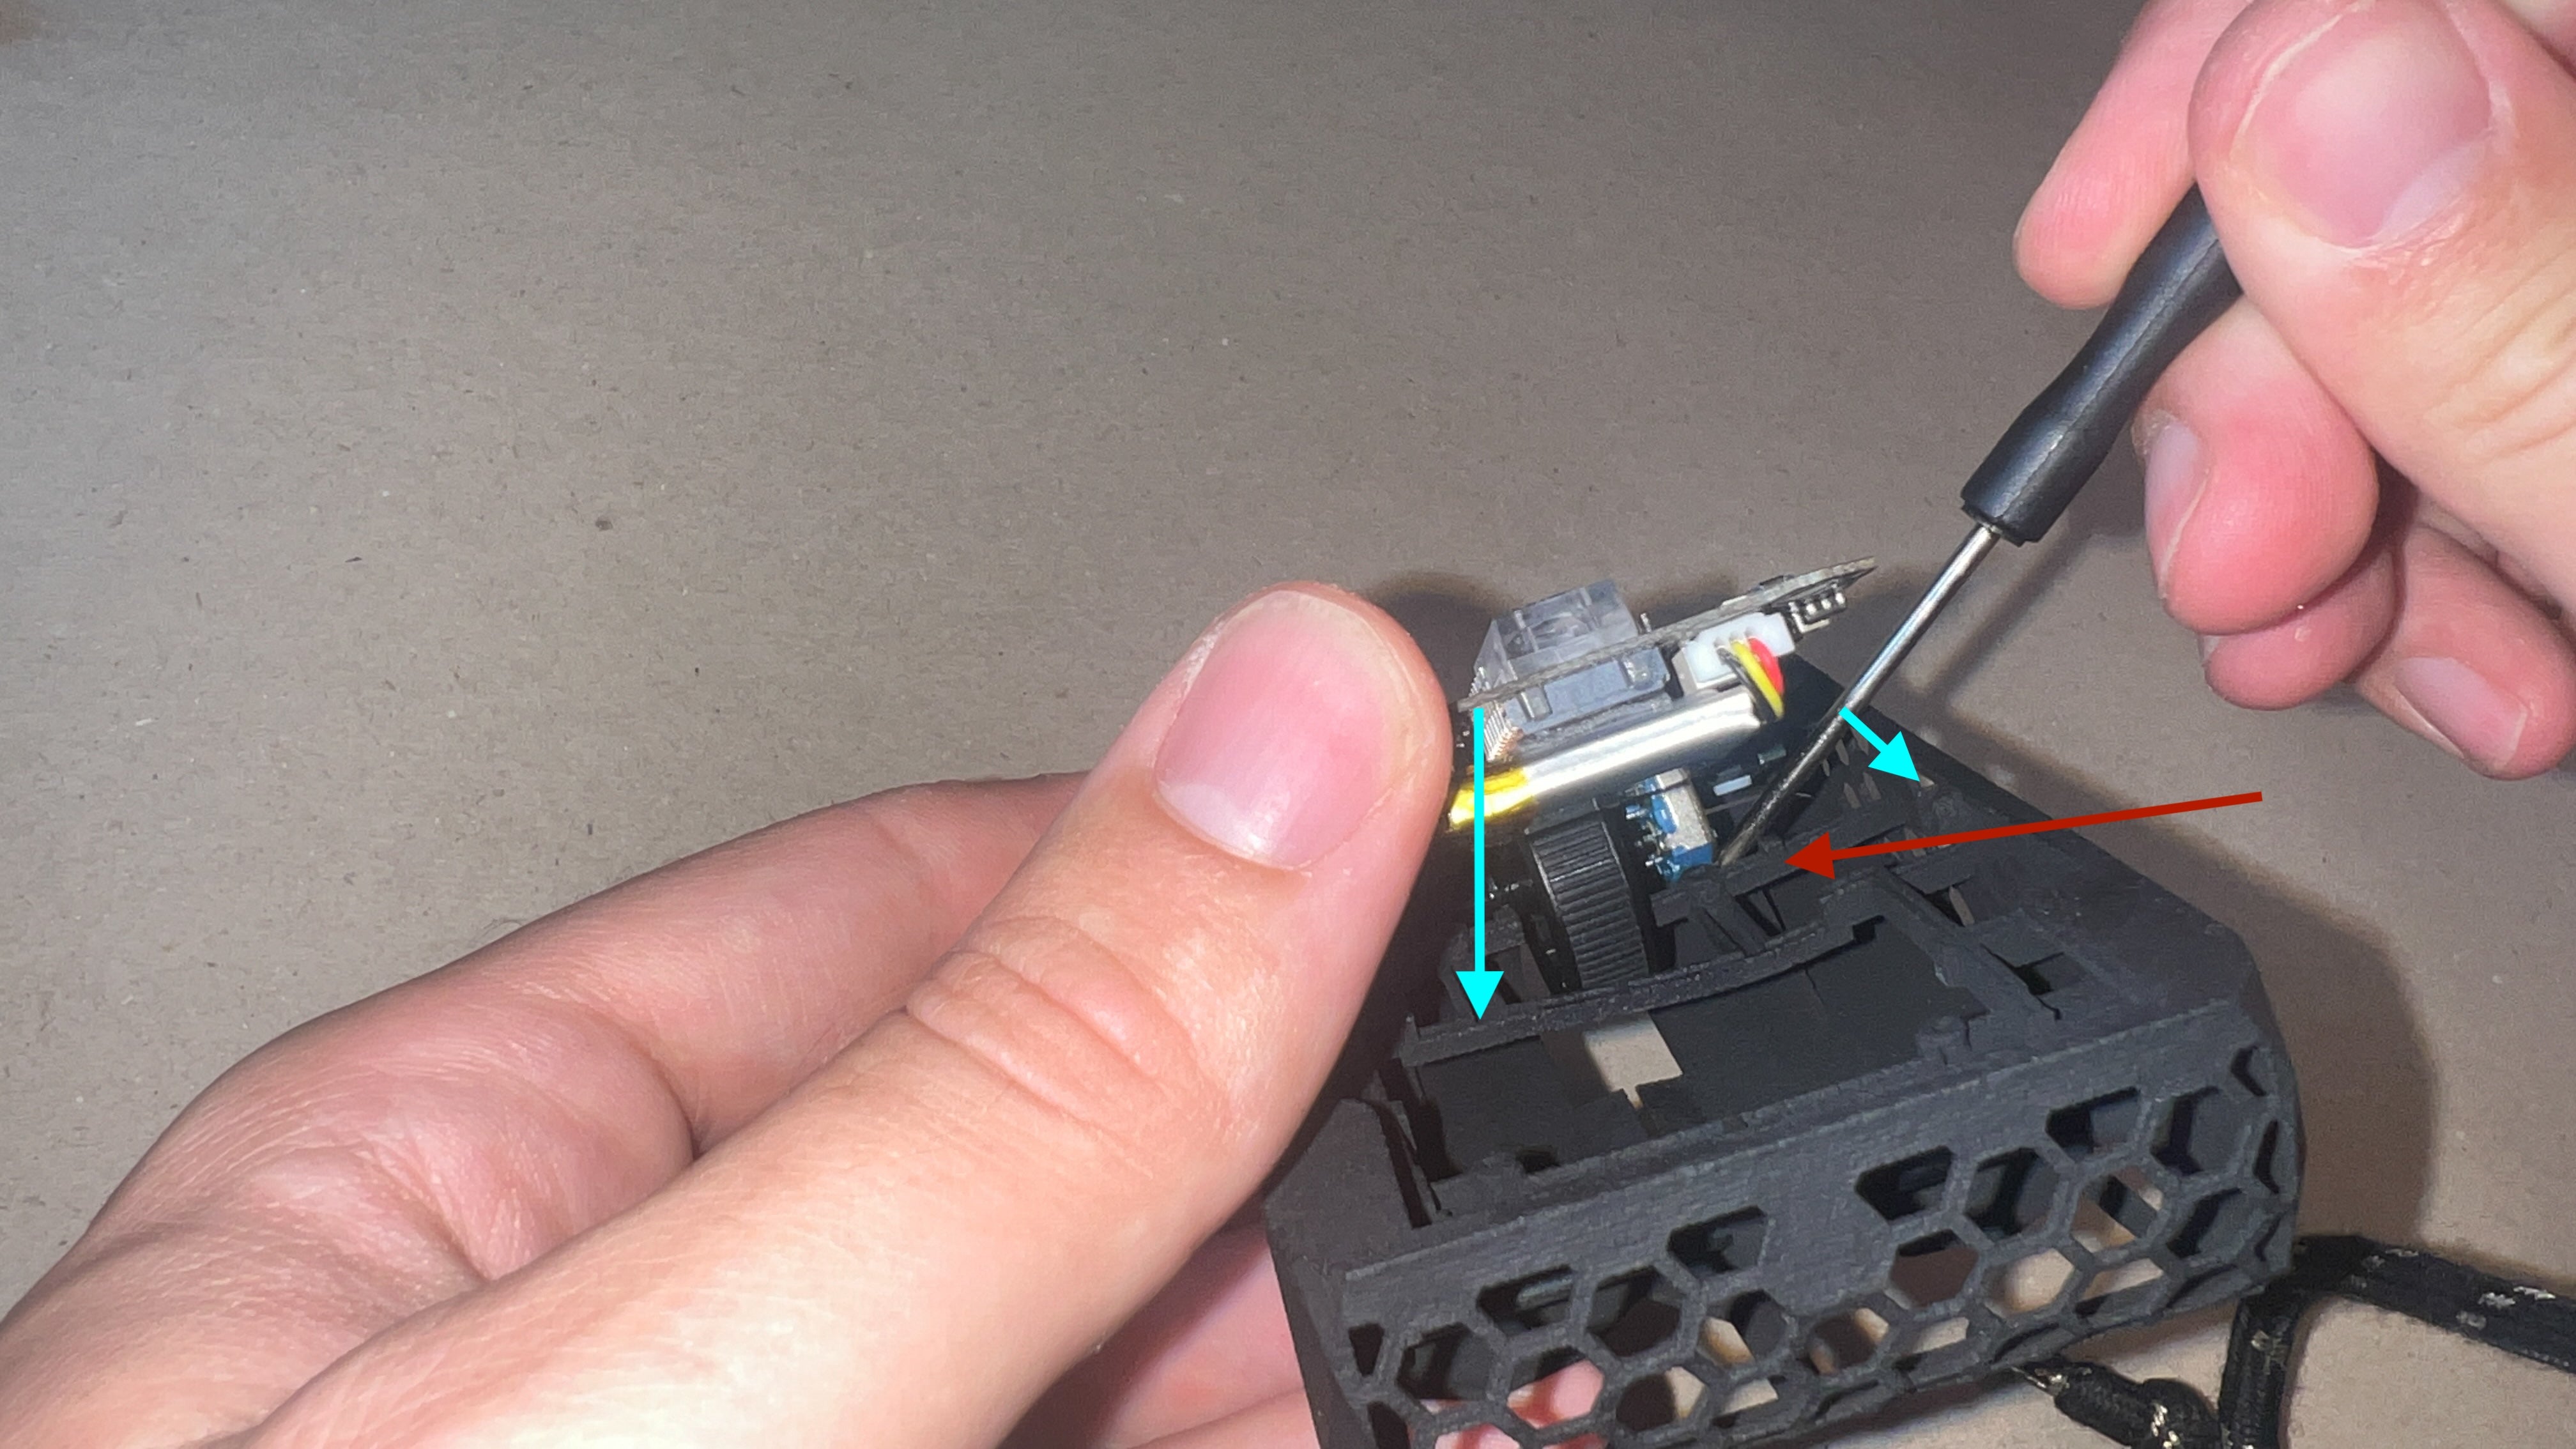
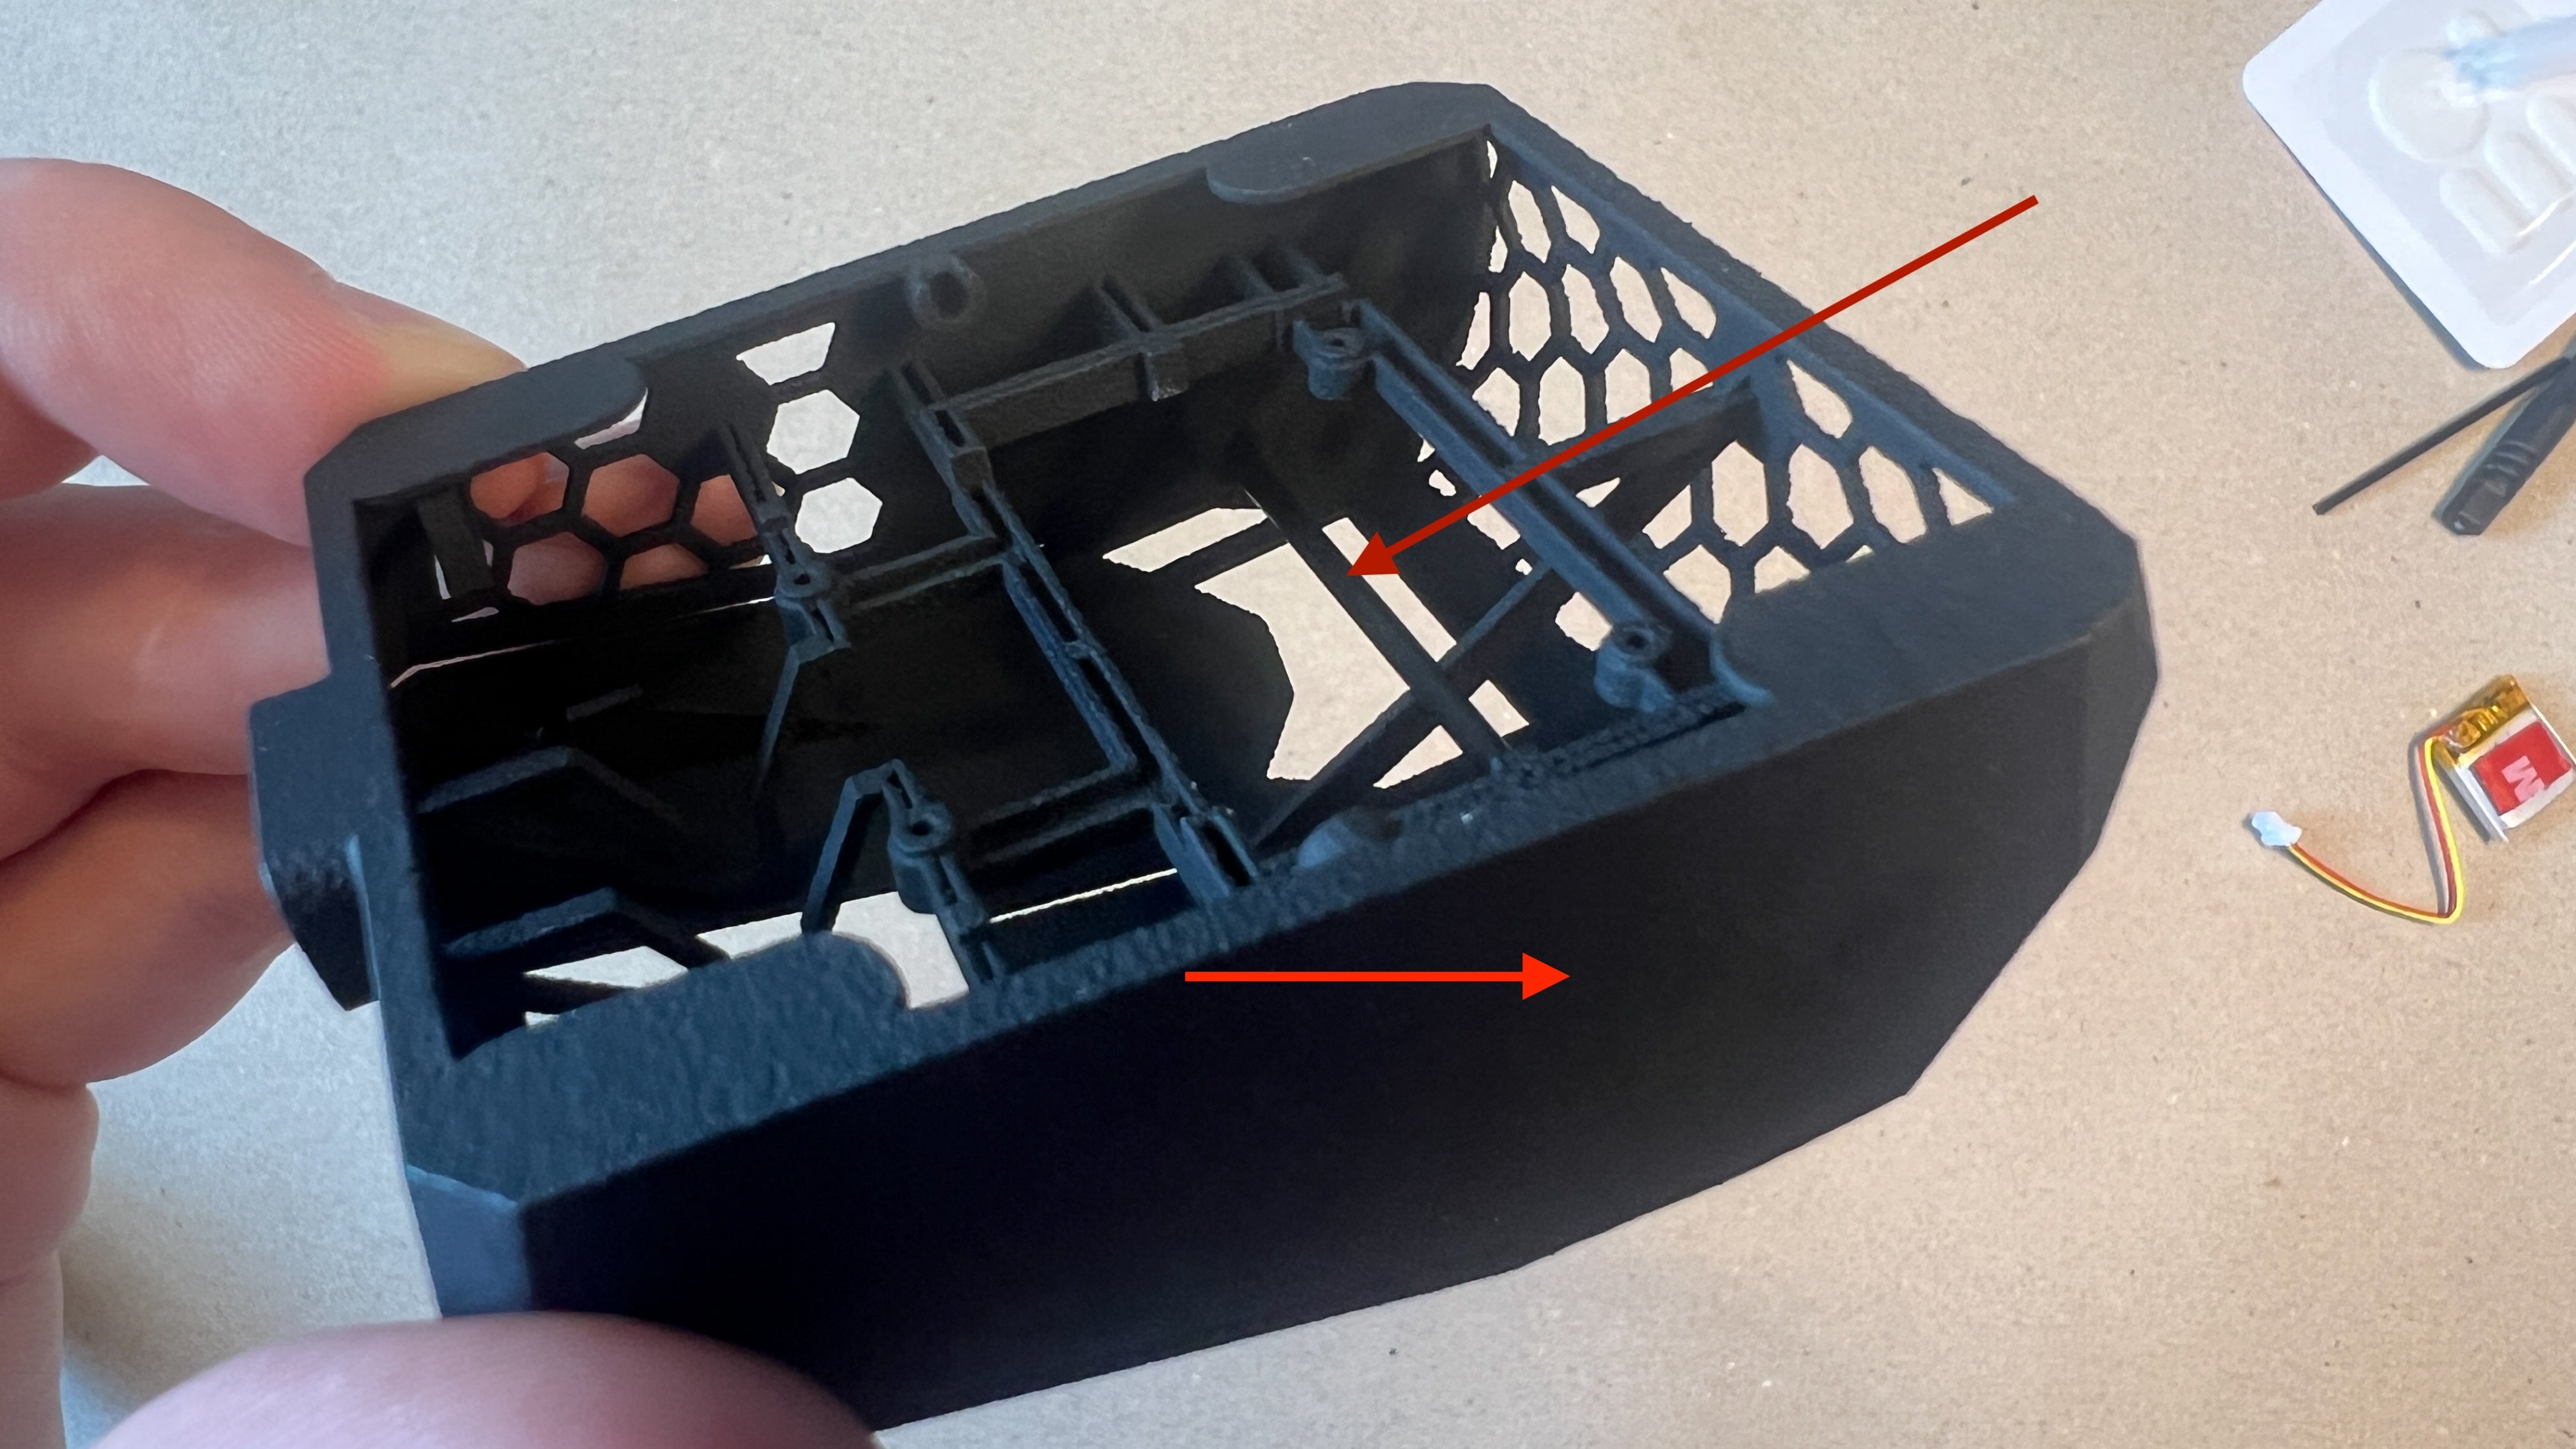
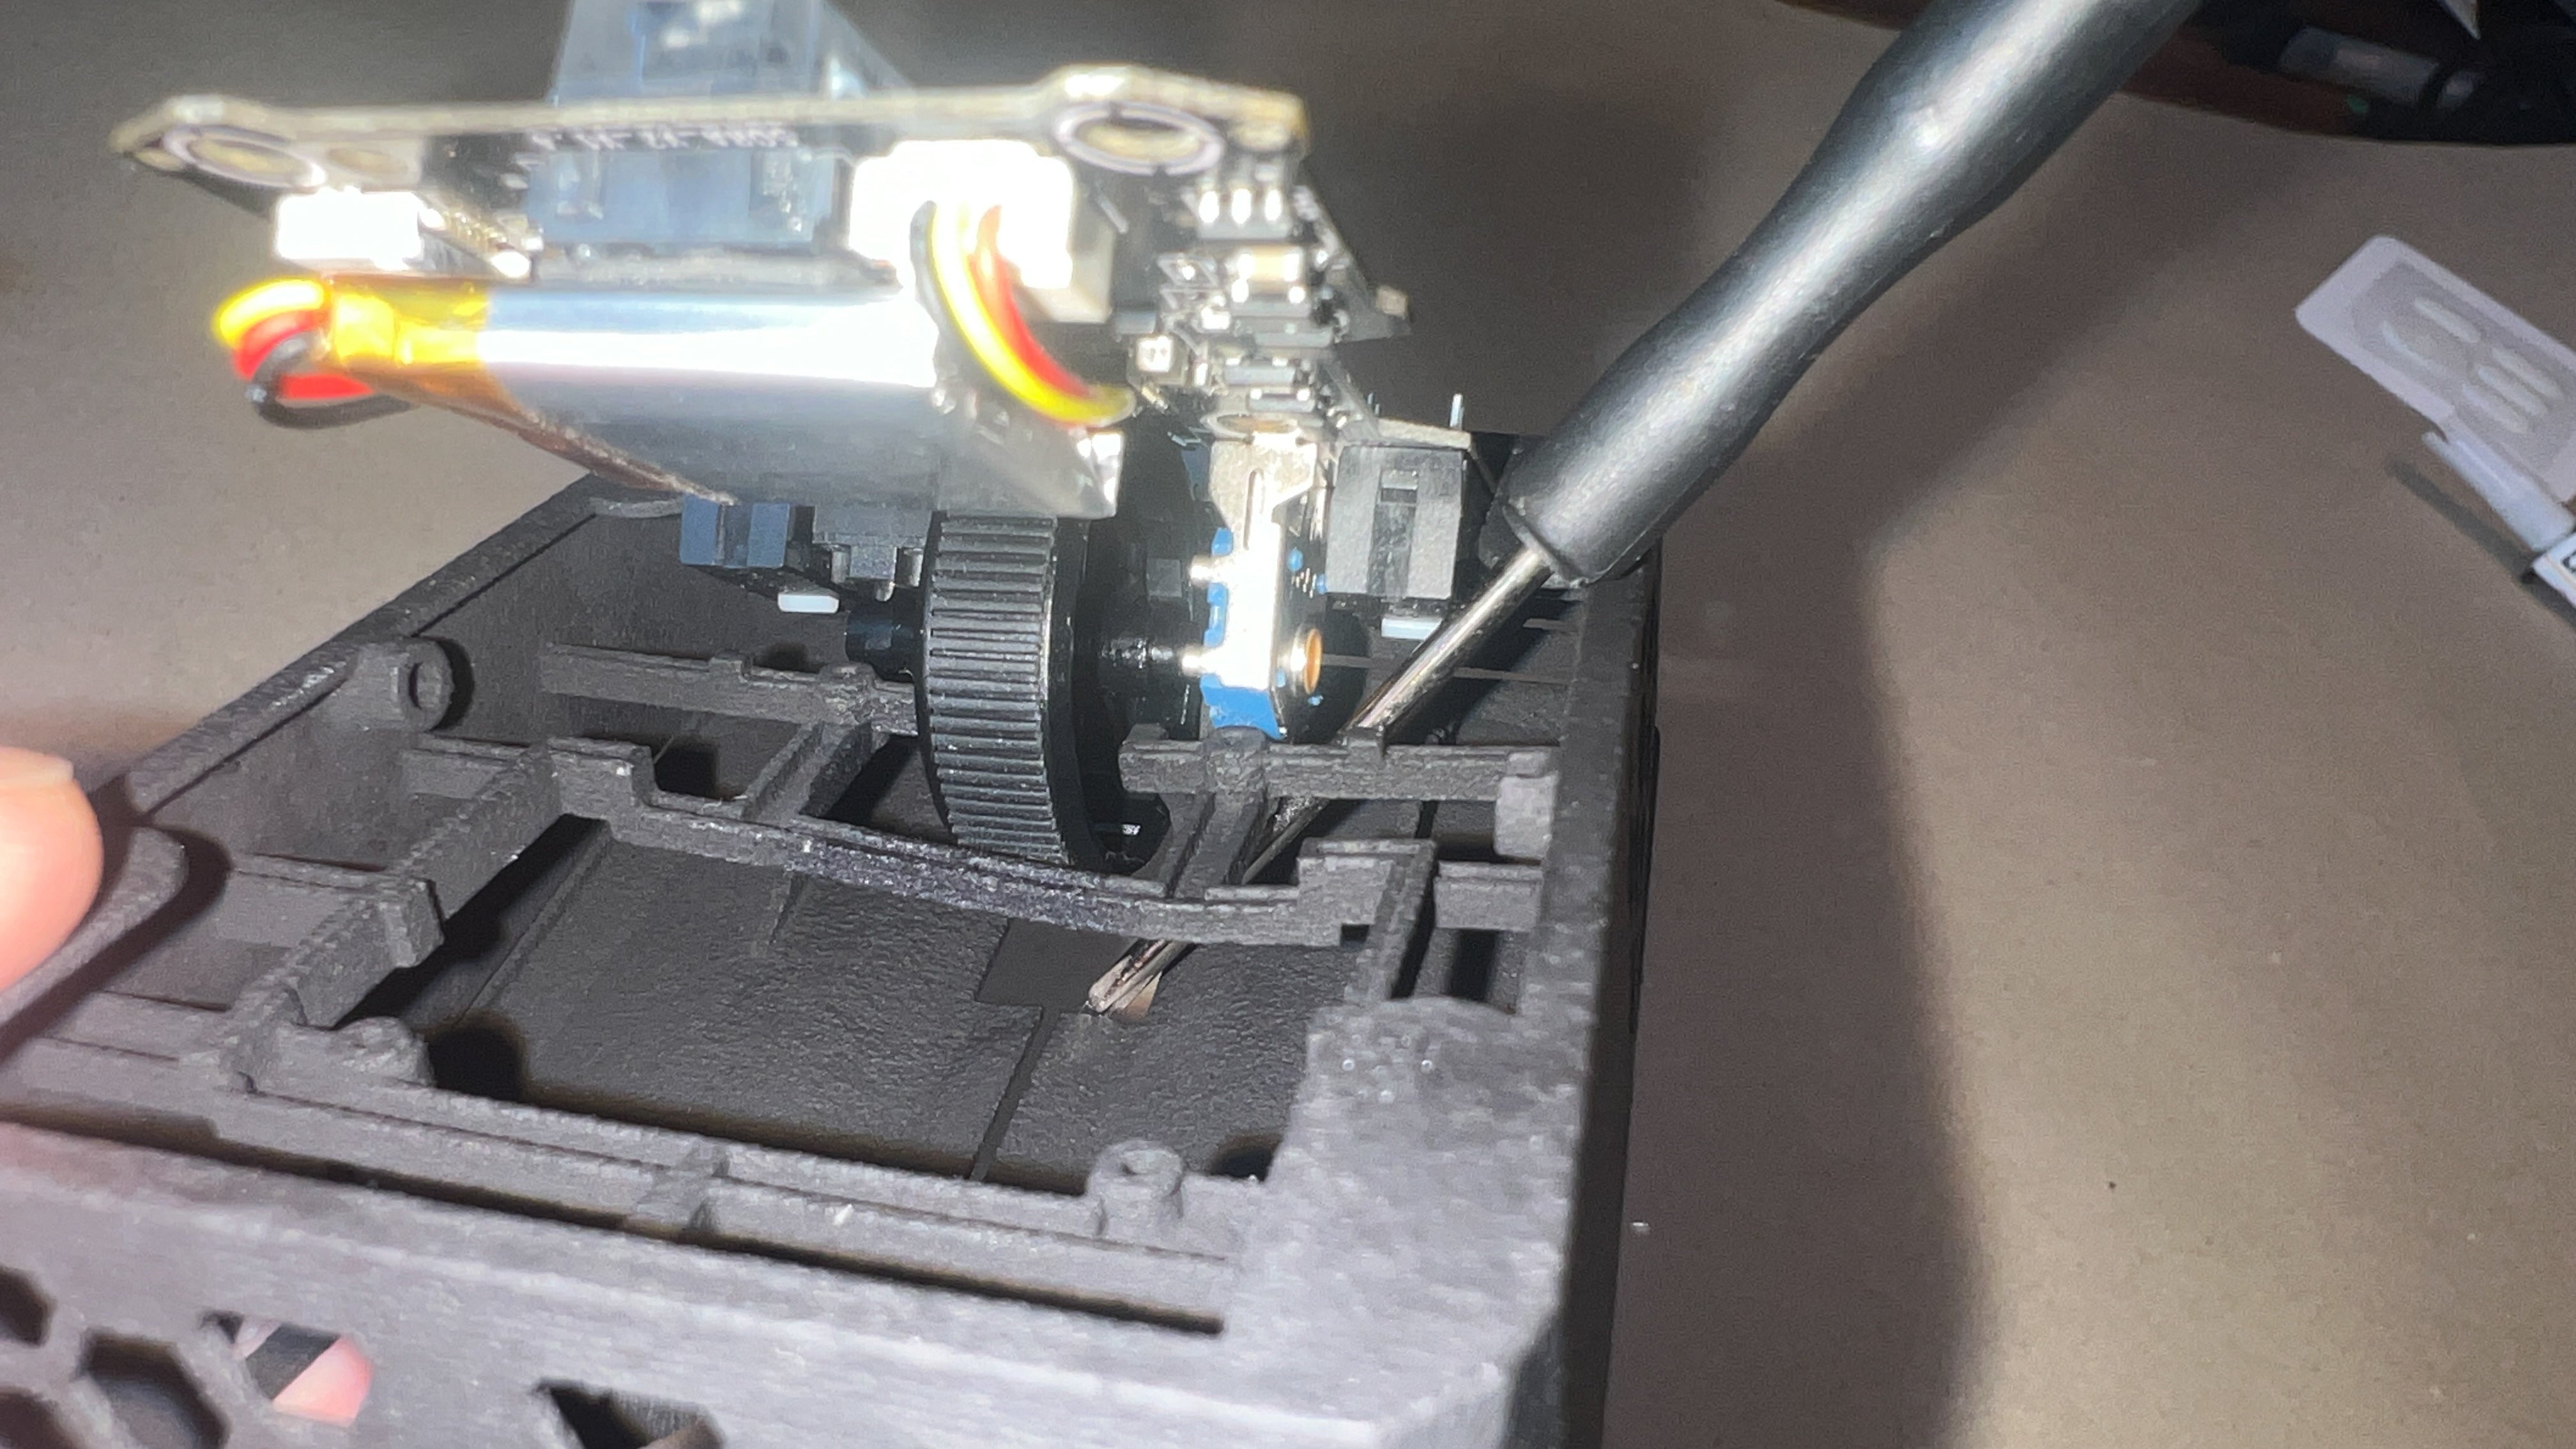
Use the screwdriver to bend the shell.
To make the PCB fit into place, use the screwdriver to bend the part which is marked with the red arrow. While doing this press the PCB gently down.
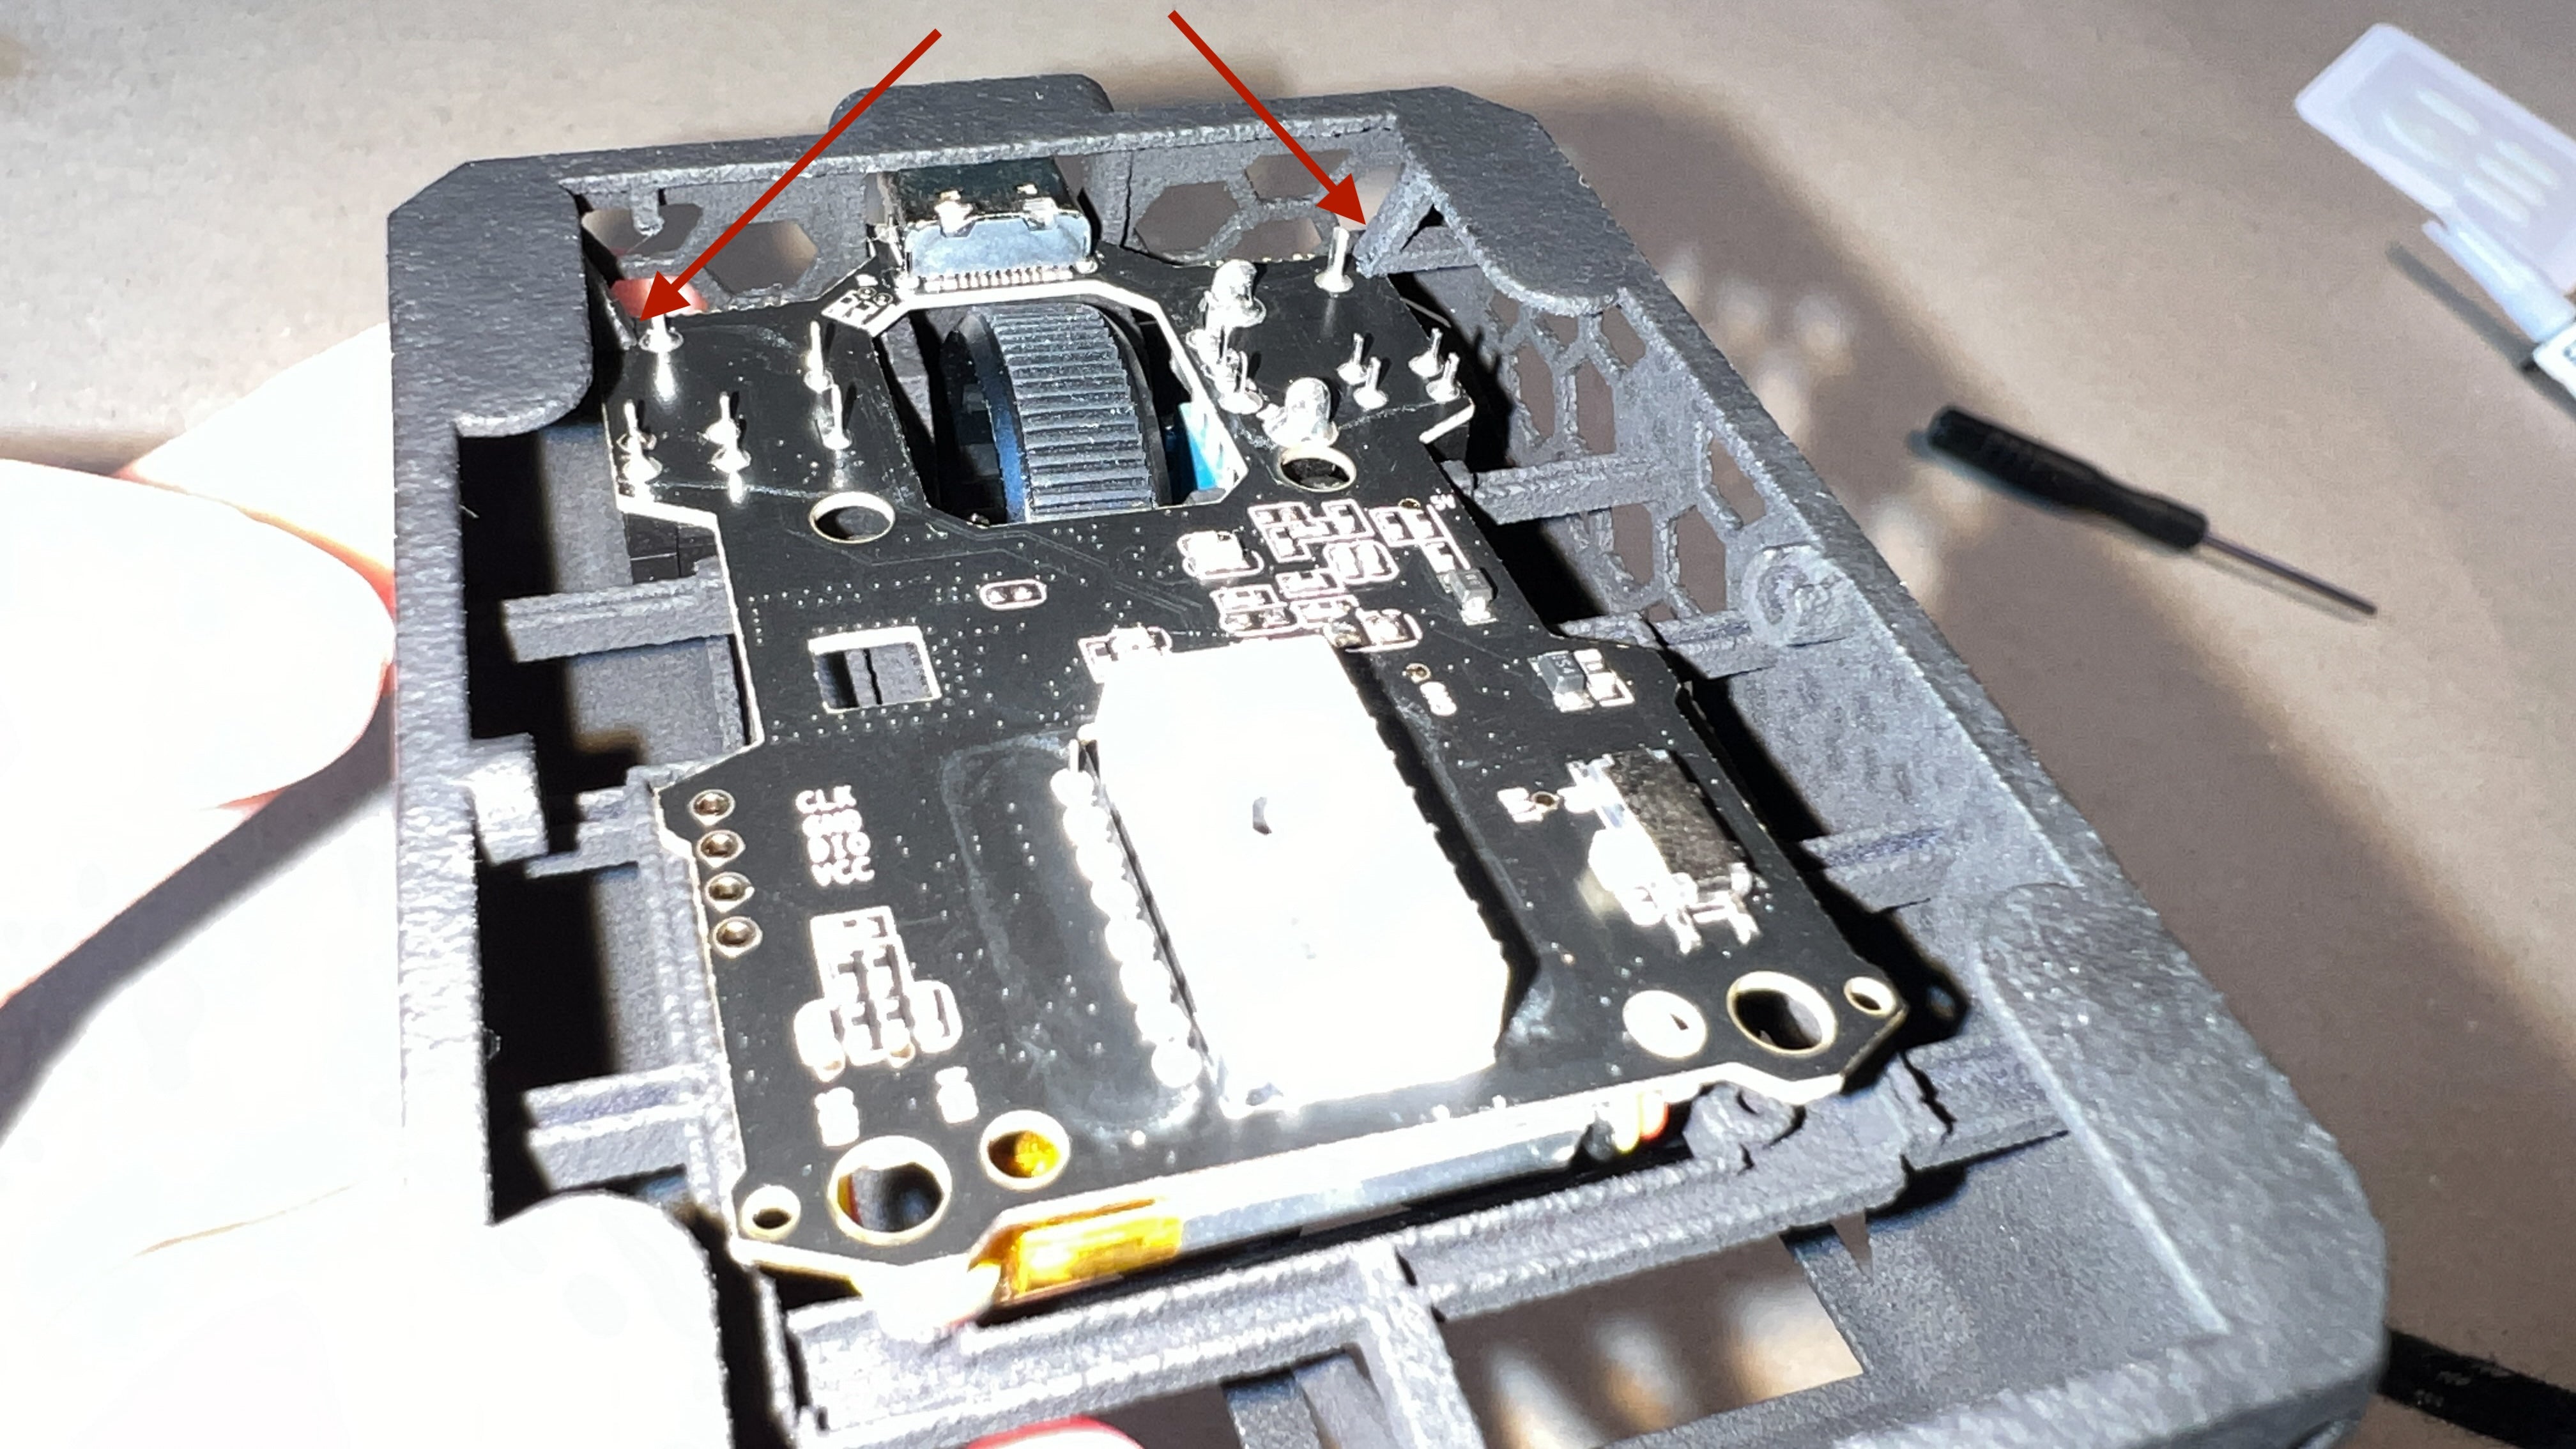
Last step before you screw on the PCB to the shell
Make sure to lever the PCB under the two PCB holders in the front.

Add screws, Carbon Fiber Rod and skates
Don't over-tighten the screws, otherwise the threads can break. Make sure to align the skates with the shell properly.
Final check
To turn on the mouse, you need to move the white knob (bottom right) towards the mouse wheel.
Check if all four mouse skates touch the ground. If that is not the case it is possible that the PCB got slightly bent during the disassembly process. To fix this problem you need to bend the shell in the opposite direction. You can keep the mouse assembled during this step. Repeat the process until all mouse skates are on the ground. If the scroll wheel feels too tight contact our support team at support@pmm.gg
Change LOD, DPI and button bindings here.
Dongle LED not turning on / Mouse not working
1. Turn off the power of the mouse, unplug the receiver and place it closer to the mouse.
2. Turn on the mouse.
3. Press the left, middle and right buttons for ten seconds at the same time.
4. Plug the receiver into the charging cable.